Showing posts with label tart. Show all posts

Monday, November 7, 2016

butternut squash and caramelized onion galette.


For the better part of the last week I've had an insane amount of election related anxiety.   I just want this thing to be over.  I know Hilary is a very polarizing candidate (actually I this the same could be said about the Donald) and I can understand why people may not like her - she can feel standoffish, secretive, and untrustworthy but, I feel that a lot of people treat her differently because she is a woman and that really bothers me.  As someone who works in a predominantly male-oriented field, I've observed on a first-hand basis the different standards that exist for men and women.   It's infuriating.   If Hilary was a man, so much of what has been said about her would never have been said.  She wouldn't be called nasty or angry - she would be considered passionate or a true leader.   Double standards suck.

These two candidates represent two very different paths for the future of America.  And one of those paths - the path where we close ourselves from the world, where we no longer allow people to come to our country to fulfill the American dream, the one where LGBT's have no rights, and women can't make their own decisions is in danger of becoming a reality.  I don't want that.   I don't believe that is what's best for us.   Trade is good, allowing gay's to marry is good, bringing refugees into this country is good.   Moving forward is good.  Showing the world America is a progressive leader is good.   

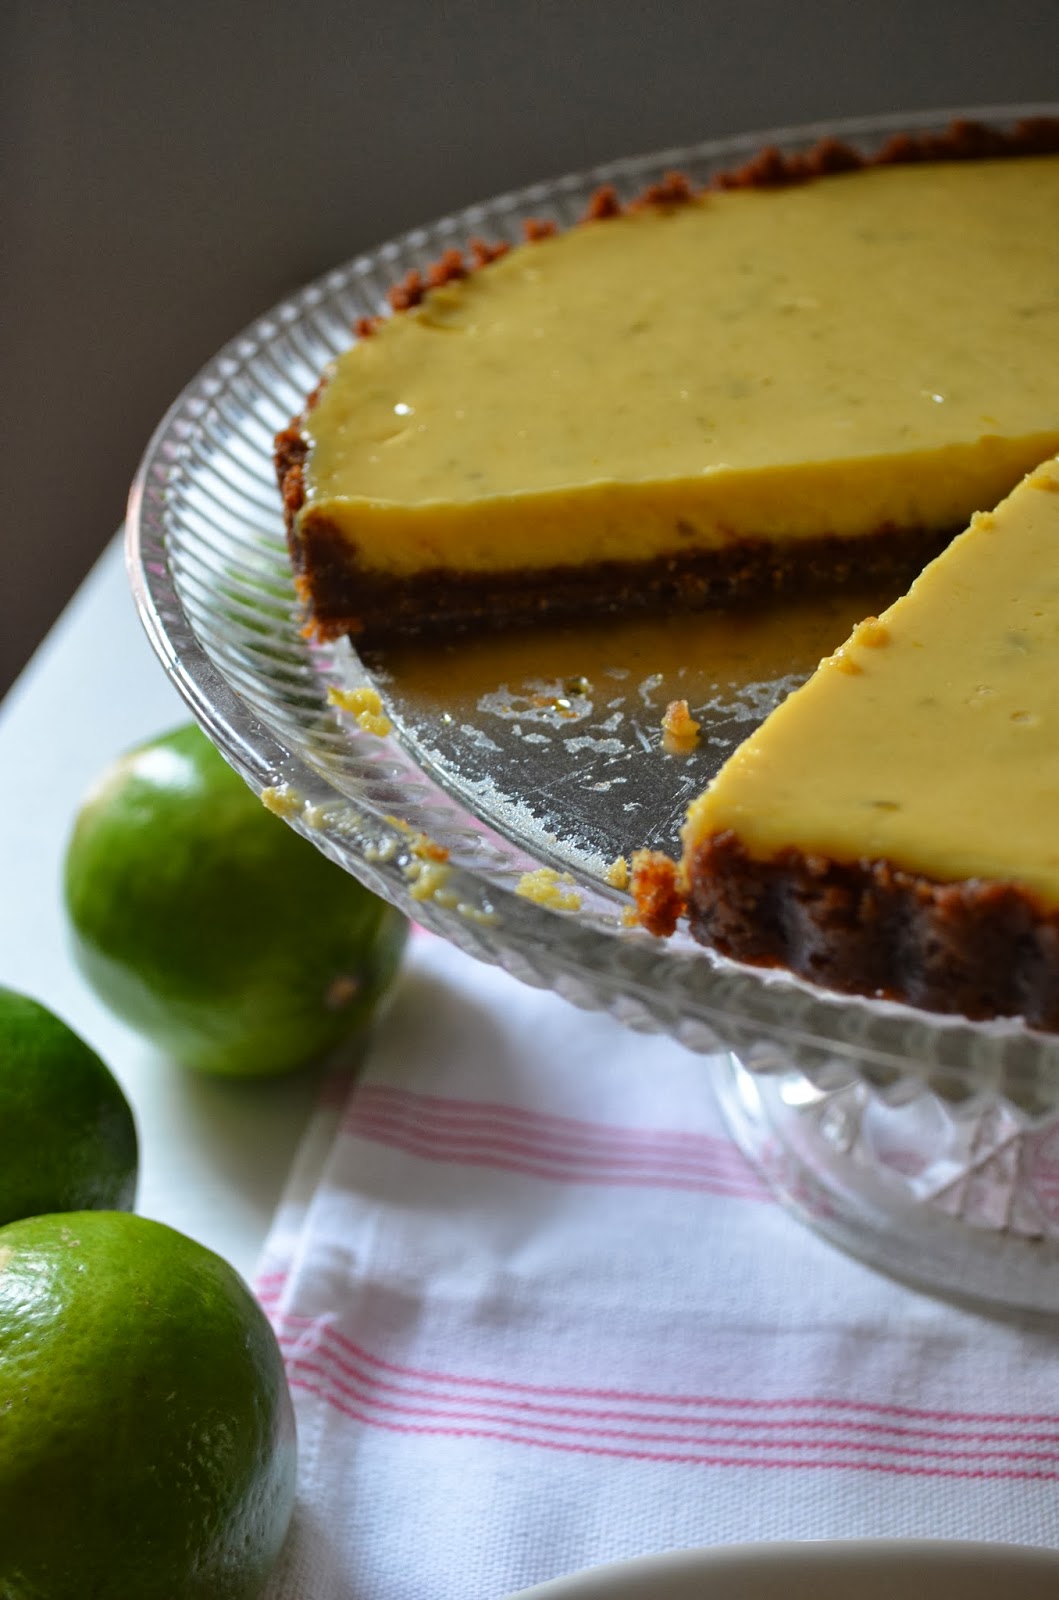
So tomorrow night Tyler and I are going to hunker down on the couch, watch the election coverage, eat this tart (which is fall at its finest), and (hopefully) watch history be made.  #werewithher      

Butternut Squash and Caramelized Onion Galette 
Recipe from Seven Spoons

This tart is one of the best things I've made in recent history.  I served it with roast chicken and vegetables but it would also make a great side for Thanksgiving (something vegetarians would appreciate it).   

A couple of notes.  The squash, onions, and dough can be prepared a day or two before you want to serve it. Just assemble the filling and bake on the day of (thus making this the ideal party food).   You can also divide the dough in half and make two 9-inch galettes.   

For the Pastry

2½ cups (320 g) all-purpose flour, including 1/2 cup whole-wheat flour if you like, plus more for work surface
1/2 teaspoon (2 g) table salt
16 tablespoons (227 g) or 2 sticks, unsalted butter
1/2 cup (64 g) sour cream or full-fat Greek yogurt, strained
1 tablespoon (15 mL) white wine vinegar
1/3 cup (79 mL) ice water

For the Filling

2 small or 1 large butternut squash, about 21/2 pounds (1134 g)
3 tablespoons (45 mL) oil
1½ teaspoons (5 g) tsp table salt
Freshly ground black pepper
1 tablespoon (14 g) butter
2 large sweet onions, such as Spanish or Vidalia, halved, thinly sliced in half-moons
1/4 teaspoon (1 g) sugar
1/4 teaspoon (1 g) cayenne pepper, or to taste (optional
2 cups (180 g) grated Italian Fontina cheese (or a combination of Fontina and Gruyere) 
1 teaspoon (4 g) chopped fresh thyme, or 2 teaspoons chopped fresh sage
1 egg beaten with 1 tsp (4 g) water, for glaze (optional, but makes for a croissant-looking finish)

To make pastry: In a bowl, combine the flour and salt. Add the whole sticks of butter and, using a pastry blender, break up the bits of butter until the texture is like cornmeal, with the biggest pieces the size of pebbles. In a small bowl, whisk together the sour cream, vinegar and water, and pour this over the butter-flour mixture. Stir with a spoon or a rubber spatula until a dough forms, kneading it once or twice on the counter if needed to bring it together. Pat the dough into a ball, wrap it in plastic and chill it in the refrigerator for an hour or up to two days.

To prepare squash: Peel the squash, then halve and scoop out seeds. Cut into ½-inch to ¾-inch chunks. Pour 2 tablespoons (30 mL) of the olive oil into one or two smaller baking sheets, spreading it to an even slick. Lay the squash chunks on the baking sheet in one layer, sprinkle with ½ teaspoon (2 g) of the salt, and freshly ground black pepper, and roast in a 400 F oven for 30 minutes, or until squash is tender, turning the pieces occasionally so that they brown evenly. Set aside to cool slightly. Leave the oven on.

While the squash is roasting, melt the butter and remaining tablespoon of olive oil in a heavy frying pan, and cook the onions over medium-low heat with the sugar and remaining teaspoon of salt, stirring occasionally, until soft and tender, about 25 minutes. Stir in the cayenne pepper, if using.

Mix the squash, caramelized onions, cheese and herbs together in a bowl.

To assemble the galette: On a floured work surface, roll the dough out into a 16- to 17-inch round. Transfer to a parchment-lined baking sheet. Spread the squash-and-cheese mixture over the dough, leaving a 2 to 2½-inch border. Fold the border over the squash and cheese, pleating the edge to make it fit. The centre will be open. Brush the outside of the crust with the egg-yolk wash, if using.

Bake until golden brown, 30 to 40 minutes. Remove the galette from the oven, let stand for five minutes, then slide onto a serving plate. Cut into wedges and serve hot, warm or at room temperature.

Makes 1 hearty 12-inch galette, serving 8


Saturday, December 12, 2015

roasted leek and white bean galettes.

It isn't very often (I would actually go so far as to say it only happens once in a blue moon) that I set out to make a recipe and actually have all of the ingredients on hand.   Usually a trip to the supermarket is involved or a walk to the bodega at the end of the block.   Usually something is missing and at that moment I begin cursing myself for my inability to plan ahead.

I keep a list in my phone of the never-ending collection of recipes I want to make.  It runs the gamut from semolina gnoochi to rainbow cookies and just about everything in between.  It helps me prioritize my weekend cooking activities and ensures I don't forget all of the absurdly amazing things I come across and think "I have to make this".  This roasted leek and white bean galette recipe made the list the second I finished reading the Smitten Kitchen blog post.  I love food that is both rustic and impossibly French.  

And somehow and someway (by the grace of the food gods?), I realized last weekend that I had everything on hand to make said galettes.  Which I did, about 5 minutes after realizing that.

These galettes are the perfect winter dinner/dinner party main (or side!).  They are impossibly cute (though as Deb notes, you can make 1 large galette) and the flavors are warm and comforting i.e. exactly what you want to eat in the dead of winter (though I'm not sure if we are actually going to have a winter this year?).  White beans and leeks are like the French version of peanut butter and jelly; they just work together.  Especially when paired with grueyere and a slew of black pepper.

Roasted Leek and White Bean Galettes
Recipe from Smitten Kitchen

For the Pastry

1 1/4 cups (160 grams) all-purpose flour
1/4 teaspoon table salt
8 tablespoons (4 ounces or 115 grams) cold unsalted butter, cut into pieces and chill again
1/4 cup (60 grams) plain yogurt or sour cream
2 teaspoons (10 ml) fresh lemon juice
1/4 cup (60 ml) ice water

For the Filling

6 small-to-medium leeks, dark green tops discarded, white and light green parts halved lengthwise
2 tablespoons olive oil
Kosher salt
Freshly ground black pepper
1 15-ounce can cannellini beans, rinsed and drained (or 15 ounces of dried beans that you cook yourself)
1 garlic clove, minced
1/4 teaspoon finely grated lemon zest
1/4 cup chopped flat-leaf parsley
2/3 cup grated gruyère cheese, divided

Glaze

1 egg yolk beaten with 1 teaspoon water

Make dough: Stir the flour and salt together in a large bowl. Sprinkle bits of butter over dough and, using a pastry blender or your fingertips, work it into the flour until the mixture resembles coarse meal, with the biggest pieces of butter the size of tiny peas. In a small bowl, stir together the sour cream, lemon juice and water and add this to the butter-flour mixture. With your fingertips or a wooden spoon, mix in the liquid until large lumps form. Pat the lumps into a ball. Wrap with plastic and refrigerate for 1 hour, or up to 2 days.

Meanwhile, prepare filling: Heat the oven to 400 degrees F. Arrange leeks cut-side-up in a large (9×13-inch) baking dish. Drizzle with olive oil. Sprinkle with 1 teaspoon kosher salt and freshly ground black pepper. Flip the leeks so that their cut sides face down, add 3 tablespoons of water to the dish, cover tightly with aluminum foil and bake for 20 minutes until tender. Uncover and continue roasting the leeks for 10 to 15 minutes, or until caramelized. Leave oven on. Let leeks cool slightly, then chop into segments and place in a large bowl. Toss with beans, garlic, lemon zest, parsley, 1/2 cup grated cheese and season with salt and pepper to taste.

Assemble galettes: Divide dough into 4 pieces. On a floured counter, roll the first piece dough out into a roughly 8-inch round, although it really doesn’t need to be perfectly shaped. Transfer to a large parchment-lined baking sheet; I like to fold my dough gently, without creasing, in quarters then unfold it onto the baking pan. Sprinkle about 1/4 of the prepared filling into the center of the dough, leaving a 1 1/2-inch border. Sprinkle with about 1/4 of the remaining cheese. Fold the border over the filling, pleating the edge to make it fit. The center will be open. Brush crust with egg yolk glaze. Repeat with remaining dough and filling, making 4 small galettes.

Bake the galettes: For 25 to 30 minutes, until golden brown all over. Remove from the oven and let stand for 5 minutes, then slide the galette onto a serving plate. Or, if you’re planning ahead, let cool completely and refrigerate until needed. Gently rewarm before serving in a low oven.


Thursday, October 15, 2015

roasted tomato-basil tart.


While I love a good raw tomato (preferably eaten with burrata and basil) I love (head over heels love) oven-roasted tomatoes; something about their concentrated flavor just makes me crazy.  They work in sandwiches and are the ideal addition to cheesy scrambled eggs (you don't have to deal with that watery mess that can plague fresh tomatoes).  This is why I've declared them one of the most perfect foods.  Over the last couple of weeks, I've been buying up as many San Marzano plum tomatoes as possible and spending lazy Sundays reading in bed while my tomatoes roast.  It's not a bad way to spend a day. 

But where roasted tomatoes really shine is in a tart.   When you bake a tart with fresh tomatoes you have to deal with that awful watery tomato juice mess which causes the tart base to get soggy and turn into mush.  We don't want a mushy tart.  We want crispy and buttery and tender!  Roasted tomatoes solve that problem and also provide an extra element of flavor i.e. unmami and we love unmami.  

This tart takes some time, but it's mostly hands-off which makes it an ideal weekend project.  Slow-roasted tomatoes get nestled in a buttery crust along with aged cheddar and a mess of caramelized onions and basil.  It's true fall comfort food and the kind of thing you crave while you still have tomatoes at the market.   

Roasted Tomato-Basil Tart
Recipe from Leites Culinaria 

For the Slow-Roasted Tomatoes

2 pounds plum tomatoes (or smallish heirloom tomatoes of any sort)
1/4 cup extra-virgin olive oil
1 tablespoon finely chopped fresh rosemary
 Salt and freshly ground black pepper

For the Tart Dough

1 cup all-purpose flour, plus more for the work surface
1/4 teaspoon salt
6 tablespoons unsalted butter, chilled and cut into small pieces
4 to 5 tablespoons ice water

For the Tart

2 tablespoons extra-virgin olive oil, plus more for drizzling
1 large yellow onion, thinly sliced
 Salt and freshly ground black pepper
1/2 pound St. George or medium-aged white Cheddar cheese, shredded
1/2 cup chiffonade of fresh basil (that means cut into long, narrow strips)
2 tablespoons crème fraîche
1 large egg mixed with 1 tablespoon whole milk

Make the slow-roasted tomatoes:  Preheat the oven to 225°F (107°C).

Cut each tomato in half crosswise. (Alternatively, if using large plum tomatoes or any size heirloom tomatoes, thickly slice the tomatoes crosswise into about 4 portions.) Arrange the sliced tomatoes, cut side up, on a rimmed baking sheet. Drizzle the tomato halves evenly with the olive oil, sprinkle with the rosemary, and season with salt and pepper. Roast the tomatoes until the moisture is completely removed, 4 to 6 hours, depending on the size of your tomatoes. The tomatoes should be dry but still soft to the touch, and when you press a tomato with your finger, it will feel plump yet exude no liquid. (If using sliced tomatoes instead of halves, you may wish to start checking them at 2 hours.) Remove from the oven and let the tomatoes cool completely.

Make the tart dough: In a bowl, whisk together the flour and salt. Scatter the butter over the flour mixture and, using your fingers, gently press the butter and flour together until it resembles a coarse meal. Drizzle the ice water over the top and, using a fork, gently toss and stir just until the dough comes together in a cohesive clump.
Gather the dough into a ball and place it on a lightly floured work surface. Flatten the dough into a thick disk and wrap in plastic wrap. Refrigerate for at least 1 hour and up to 2 days.

Assemble the tart: Position a rack in the lower third of the oven and preheat it to 375°F (190°C).

In a sauté pan, heat the 2 tablespoons oil over low heat and stir in the onion. Cover and sweat over low heat for 10 to 15 minutes, until the onion is soft and translucent. Do not allow the onion to color. (Alternatively, if you prefer properly caramelized onions, you can uncover and cook the onions until golden brown and intensely flavorful.) Remove from the heat, season with salt and pepper, and let cool completely.

Line a baking sheet with parchment paper. On a lightly floured work surface, roll out the dough to a round about 12 inches in diameter. Carefully transfer the round to the parchment.

Layer half of the cheese on the dough round, leaving a 1-inch border uncovered around the edge. In a small bowl, combine the cooled onion, the basil, and the crème fraîche and mix well. Spread the onion mixture evenly over the cheese layer. Top with the roasted tomatoes, then cover with the remaining cheese. Season with salt and pepper and drizzle with olive oil. Fold the uncovered edge of the tart onto itself, forming uniformly spaced pleats every few inches around the perimeter. Brush the overturned edge of dough with the egg wash.

Bake the tart for 30 to 40 minutes, until the crust is a nice golden brown. Remove the tart from the oven, transfer it to a wire rack, and let it cool until it’s warm or at room temperature. Slice and serve.

Thursday, July 23, 2015

almond and sweet cherry galette.

For the better part of the last 3 weeks I've been buying at least 2 pounds of cherries (sometimes close to 3) every Thursday.  Part of the reason why I've been buying so many is because Thursdays are the day I walk by 3 different farmer's markets and I feel it's my civic duty to contribute to the bottom line of every farmstand I see. It also doesn't help that I am attracted to jewel like things and cherries fit that bill nicely.  They just keep calling me and I keep answering.  

Which means cherry desserts have been a mainstay as of late.   

I hope you don't mind.  We discussed Cherry Shortbread bars a few weeks back and now it's time to discuss this Almond and Sweet Cherry Galette which is everything. Like most people, I am obsessed with the combination of cherry and almond because it just works and trying to break up something that just works isn't something I'm willing to do.  Most galettes consist of just a layer of fruit and a crust but this one, created  by the wonderful Deb at Smitten Kitchen, is a galette that has fruit, crust, and a layer of almond filling.  That extra layer of almond filling takes the galette from run of the mill to truly special. I particularly love it because it has the elegance of a tart with the simplicity of a free-form dessert.  A win-win in my book.       

Almond and Sweet Cherry Galette
Recipe from the Smitten Kitchen Cookbook

For the Galette

1 Flaky All-Butter Crust (recipe below)
1/3 cup sliced, slivered, or coarsely chopped almonds, blanched if you can get them (or almond meal)
1 1/2 teaspoons all-purpose flour
3 tablespoons granulated sugar
1 tablespoon unsalted butter, softened
1/4 teaspoon almond extract
1 large egg white
1 pound  (or a generous pound if you are anything like me) sweet cherries, any variety or a mix of varieties, pitted

To Finish

1 large egg yolk
1 teaspoon water
1 tablespoon coarse sugar

Make pastry: The dough should be refrigerated for at least an hour before you use it in this recipe.

Make filling: Finely grind almonds and flour in a food processor (if you use almond meal, you can just use a bowl and a spoon).  Mix in sugar, butter, and extract, then egg white. Blend until smooth. Cover and chill until needed.

Prepare galette: Preheat oven to 400 degrees. On a floured work surface, roll the dough out into a 12-inch round. Transfer to a baking sheet lined with parchment paper. Spread the almond filling evenly over the bottom of the galette dough, leaving a 2-inch border. Scatter the cherries on top. Fold the border over the filling, pleating the edge to make it fit; the center will be open. Whisk egg yolk with water, brush crust with egg wash mixture and sprinkle with coarse sugar.

Bake galette until the filling is puffed and the crust is golden brown, about 30 – 40 minutes, rotating front to back halfway through for even browning.  Cool, and serve.

Flaky All-Butter Crust

1 ¼ cups all-purpose flour
1 ½ teaspoons sugar
½ teaspoon table salt
1 sticks unsalted butter, very cold

Gather your ingredients: Fill a one cup liquid measuring cup with water, and drop in a few ice cubes; set it aside. In a large bowl — I like to use a very wide one, so I can get my hands in — whisk together 1 1/4 cups flour, 1 ½  teaspoons of sugar and a ½ teaspoon of salt. Dice one stick (4 ounces or 1/2 cup) of very cold unsalted butter into 1/2-inch pieces. Get out your pastry blender.

Make your mix: Sprinkle the butter cubes over the flour and begin working them in with the pastry blender, using it to scoop and redistribute the mixture as needed so all parts are worked evenly. When all of the butter pieces are the size of tiny peas — this won’t take long — stop. Yes, even if it looks uneven; you’ll thank me later.

Glue it together: Start by drizzling 1/4 cup of the ice-cold water (but not the cubes, if there are any left!) over the butter and flour mixture. Using a rubber or silicon spatula, gather the dough together. You’ll probably need an additional 2 or so tablespoons of cold water to bring it together, but add it a tablespoon as a time. Once you’re pulling large clumps with the spatula, take it out and get your hands in there (see how that big bowl comes in handy?). Gather the disparate damp clumps together into one mound, kneading them gently together.

Pack it up: Place the dough on a large piece of plastic wrap. I like to use the sides to pull in the dough and shape it into a disk. Let the dough chill in the fridge for one hour, but preferably at least two, before rolling it out.

Do ahead: Dough will keep in the fridge for about a week, and in the freezer longer. If not using it that day, wrap it in additional layers of plastic wrap to protect it from fridge/freezer smells. To defrost your dough, move it to the fridge for one day before using it.


Saturday, March 21, 2015

butterscotch banana tarte tatin.

March is one of those funny months where I get particularly confused when it comes to eating.  Winter citrus is kind of done and the farmers markets are practically empty except for potatoes and some sad looking carrots. At this point one just feels sick of everything (most notably their winter boots and parkas).  

But usually in March I begin to develop a fondness for bananas. Slathered in peanut butter they make for a most excellent breakfast and nestled in pockets of butterscotch they become a most epic dessert. The kind of dessert that transports you to a place that isn't New York on the first day of spring when it's supposed to snow 3-6 inches (I think we all need to be transported to our happy place right about now.)

Tarte tatin is one fancy looking dessert.  People squeal for it.  But in all honesty it's one of the simplest things you can make.  It's essentially ripe fruit, sugar, and puff-pastry.  It's a one pan dish!  Let's think about that for a second.  This butterscotch banana one is EVERYTHING I want to be eating right now seeing as bananas and caramel just go together.  I recommend serving generous wedges to the ones you love and topping each slice with a scoop of vanilla ice cream and a  sprinkle of cooca nibs (for crunch).  It serves as a nice distraction from everything else.   


Butterscotch Banana Tarte Tatin
Recipe from the Smitten Kitchen Cookbook

All-purpose flour, for work surface
1 sheet frozen puff-pastry dough, thawed in the refrigerator for 1 day (I beg of you to get the all-butter one by Dufour)
3 tablespoons unsalted butter
1/2 cup packed dark-brown sugar
1/2 teaspoon sea salt flakes
5 large ripe (but not speckled) bananas, peeled, halved lengthwise
1 teaspoon vanilla extract
2 tbsp bourbon or Scotch (optional)
Vanilla ice cream and cocoa nibs (optional), for serving

For this recipe, you’ll need a 9 or 10-inch heavy-duty skillet (cast-iron works great). Preheat your oven to 400°F (200°C). Roll out your puff pastry on a floured surface to a 9- [or 10] inch circle, and trim if necessary. Place the pastry between two pieces of wax paper and transfer to the fridge until needed. 

Melt the butter in the skillet over medium-high heat. Stir in the sugar and salt. Cook, stirring frequently to make sure the sugar doesn't burn, until the mixture turns medium amber, about 3 minutes. Arrange the bananas in the skillet, overlapping them slightly. Cook, without stirring, for 3 minutes. Drizzle the vanilla and the alcohol of your choice (if using) over the bananas, and cook until most of the liquor has evaporated and the liquid has thickened, about 1-2 minutes. Remove the bananas from heat. Place the pastry round on top of the bananas, and transfer it to the oven.


Bake until the pastry is golden brown and puffed, about 25 minutes. Remove the tarte from the oven, and carefully invert the tart onto a serving plate. Serve with vanilla ice cream.  


Monday, August 18, 2014

tomato galette with goat cheese and rosemary.

Somehow summer has escaped me and I can't entirely figure out how it happened.  

With 2 weeks to go until Labor Day, the boy and I decided, despite the cooler summer temperatures, that it was time to make a trip to the beach (because what's summer without at least one trip to the beach). Sandwiches were made, freshly baked cookies were packed, orange Gatorade was purchased (it's my favorite, don't judge).  We lay in the sand with books (and Kindle's) in our hands. The new fall fashion magazines were devoured and check lists were made of fall must haves (a light grey crewneck sweater and pinstripe work pants please).  The day ended with a walk down the Asbury Park boardwalk and the consumption of one too many Korean fusion tacos.  It was kind of perfect.  

I figured if I was going to embrace summer, I might as well keep it a consistent weekend theme which is how I found myself turning the most glorious heirloom cherry tomatoes into a galette.  A whole wheat crust was made.  Tomatoes both halved and quartered were tossed with olive oil, rosemary, and crumbled goat cheese and then piled into the center of the whole wheat crust.  As the galette baked, the tomatoes began to char and breakdown, their juices mingling with the rosemary and goat cheese.  And then we ate it, by the last rays of Sunday night light.  

Tomato Galette with Goat Cheese and Rosemary

1 batch of dough (recipe below)
550 grams of assorted cherry tomatoes (the more assorted the better) or about 4 cups halved and quartered
2 ounces of crumbled goat cheese
1 tablespoon olive oil
salt and pepper to taste
2 tablespoons rosemary

Preheat the oven to 400°. 

Line a large rimless baking sheet with parchment paper.

In a bowl combine the tomatoes, goat cheese, olive oil, salt, pepper, and rosemary.  Toss to combine and set aside.

On a lightly floured surface, roll out the dough to a 14-inch round. Transfer it to the baking sheet.

Spread the tomatoes on top of the dough leaving a 2 inch border all around.  Fold up the edges of the dough over the filling.  

Bake in the middle of the oven for about 35 minutes or until the tomatoes are burst and the pastry and browned and cooked through.  Let cool before serving.

Galette Dough
Recipe adapted from Food and Wine

2/3 cup all-purpose flour
1/3 cup whole wheat flour
1/2 teaspoon sugar
Pinch of salt
6 tablespoons cold unsalted butter, cut into 1/2-inch pieces
3-4 tablespoons ice water

In a bowl, mix the flour with the sugar and salt. Using a pastry blender or your fingers, cut in half of the butter until the mixture resembles coarse meal. Cut in the remaining butter until the largest pieces are the size of lima beans. Drizzle the water over the dough and stir until moistened. (Start with 3 tablespoons and add more if needed.)  Gather up the dough and knead it 2 or 3 times. Flatten the dough into a disk, wrap in plastic and refrigerate for at least 30 minutes.


Thursday, July 24, 2014

apricot and cherry tart with marzipan topping.

I have found myself hoarding stone fruit.  
(There are worse things I could hoard, right?)

It started with 2 quarts of cherries and before I knew it, I was coming home almost daily with pounds of apricots and plums and more cherries then I could ever possibly eat.  I can't resist.  (Restraint is not one of my strong suits.)  They look like jewels and if there is anything I am drawn to it's bright, shinny, colorful objects.  (Tyler can attest to this.)

This tart was made out of necessity but the result is so damm good that I may require myself to continue my stone fruit frenzy.  

A delicate French tart shell serves as the base for a plethora of apricots and cherries.  The marzipan topping is everything.  Crunchy, almondy (so much almond flavor because nothing goes better with fruit then almonds), sweet but not too sweet.  It's a strussel but so much better.  As the tart bakes, the fruit breaks down turning into a tender mess of deliciousness.  The softened fruit marries beautiful with the crisp topping which is why it's such a perfect summer dessert (especially if served with whipped cream, just saying).  

Apricot and Cherry Tart with Marzipan Topping
Recipe from David Lebovitz

I played around with the ratio of fruit by using more cherries and less apricots (9 apricots and about 23 cherries). But any ratio would be lovely.  It would also be stellar with just one of the fruits.  The choice is yours.  In my constant attempt to sneak in whole grains, I subbed half the flour in the topping for whole wheat and it was a welcome addition.  

For the marzipan topping

1/2 cup (70g) flour (or 1/4 cup whole wheat and 1/4 cup all-purpose)
1/2 cup (70g) firmly packed light brown sugar
1/3 cup (3 ounces, 85g) almond paste
1/4 cup (40g) sliced almonds (blanched or unblanched) (or whole almonds chopped also works)
1-2 drops pure almond extract
4 tablespoons (2 ounces, 55g) salted or unsalted butter, cubed and chilled

For the fruit

12 ripe apricots
15 cherries
1 tablespoon cornstarch
1/4 cup (50g) granulated sugar

One 9-inch (23cm) prebaked French tart shell (recipe below!)

Make the topping by mixing the flour, brown sugar, almond paste, sliced almonds, almond extract (if using), and butter with your fingers, or a pastry blender, until the pieces of almond paste and butter are the size of kernels of corn. Preheat the oven to 375ºF (109ºC).

Pit and halve the apricots and slice them into 1/2-inch (1.5cm) slices. Stem and pit the cherries, and halve them. Toss the apricots and cherries in a bowl with the cornstarch and granulated sugar, and spread the fruit into the baked tart shell.

Strew the marzipan topping over the fruit and bake until the top is golden brown and the fruit is bubbling around the edges, 30 to 40 minutes.

(I’ve not had this tart run over, but if you’re the cautious type, you can bake it on a foil-lined baking sheet, in case there are any spills.)

Remove from the oven and let cool a bit before serving.

Serving: The tart can be served just as it is, warm or at room temperature. It can be accompanied by ice cream, such as vanilla ice cream or whipped cream.

Storage: The tart will keep for up to three days at room temperature however the crisp topping will soften considerably by the second day.

French Pastry Dough
Recipe from David Lebovitz

Makes one 9 (23 cm) tart shell

90 g (3 ounces) unsalted butter, cut into pieces
1 tablespoon vegetable oil (I used canola)
3 tablespoons water
1 tablespoon sugar
1/8 teaspoon salt
150 g (5oz, or 1 slightly-rounded cup) flour

Preheat the oven to 410º F (210º C).

In a medium-sized ovenproof bowl, such as a Pyrex bowl, combine the butter, oil, water, sugar, and salt.

Place the bowl in the oven for 15 minutes, until the butter is bubbling and starts to brown just around the edges.

When done, remove the bowl from oven (and be careful, since the bowl will be hot and the mixture might sputter a bit), dump in the flour and stir it in quickly, until it comes together and forms a ball which pulls away from the sides of the bowl.

Transfer the dough to a 9-inch (23 cm) tart mold with a removable bottom and spread it a bit with a spatula.

Once the dough is cool enough to handle, pat it into the shell with the heel of your and, and use your fingers to press it up the sides of the tart mold.

Prick the dough all over with the tines of a fork about ten times, then bake the tart shell in the oven for 15 minutes, or until the dough is golden brown.

Let the shell cool before filling.


Wednesday, May 7, 2014

italian jam shortbread tart.


This tart.  This tart is for when you unexpectedly and at the very last minute get invited to a soiree where you feel it necessary to bring the host or hostess a little something.  Something pretty and simple and rustic.  This tart is so darn quick and easy to put together it scares me because I now know I can make a jam tart that tastes absurdly delicious in under an hour.  My thighs are not happy about this discovery.  My stomach on the other hand is very, very happy about this discovery.  

I wont say this is my new favorite dessert but knowing that we are entering homemade jam season (rhubarb! peach! strawberry!) and I now have a vehicle for transporting that jam into my mouth (other then bread) makes me very happy.  Especially when that vehicle is a buttery almond flavored shortbread crust.

Italian Jam Shortbread Tart 

Recipe adapted from Food 52 

The only change I made was to generously double the amount of jam.  2 ounces was what the original recipe called for and in my opinion, 2 ounces wouldn't provide enough of a jam/shorbread contrast.  More is better here! 

Serves 8 to 10

12 tablespoons (6 ounces) unsalted butter, softened
½ cup (3 1/2 ounces) sugar
¼ teaspoon pure almond extract
1 ½ cup (7 ½ ounces) unbleached all-purpose flour
1/8 teaspoon salt
Generous ½  cup (about 5 ounces) not too sweet apricot or cherry jam (or other jam of your choice)
1/3 cup (1 ounce) sliced natural almonds
Flaky sea salt for sprinkling

Heat the oven to 350 °F. Position an oven rack in the center of oven.

Place the butter, and sugar in the bowl of an electric mixer fitted with the paddle attachment (a handheld mixer is fine; just allow a little extra time to reach each stage in the recipe). Beat on medium speed until the mixture is very light in color, about 3 to 4 minutes. Use a rubber spatula to scrape down the sides of the bowl. Add the almond extract and blend well, another 30 seconds.

In a separate bowl, whisk together the flour and salt. Add the dry ingredients to the butter mixture and combine on a low speed just until the dough is thoroughly combined, about 30 to 40 seconds. Measure out 1/2 cup of the dough and set it on a small plate, then place the plate in the freezer (this will chill the dough and make it easier to crumble).

Press the remaining dough into a 9 or 9 1/2-inch tart pan in an even layer (the edges can be a little higher than the rest, just be careful that the center is not the thickest point). If the dough is too sticky, just chill it briefly.

Use a small offset spatula or the back of a spoon to spread the jam in a thin, even layer over the surface of the dough, leaving a border of about ½ -inch around the edges.

Remove the reserved dough from the freezer and crumble it into small pieces over the layer of the jam, allowing some of the jam to peek through. Sprinkle the sliced almonds evenly over the top of the tart. Sprinkle sea salt.  

Bake for 35 to 40 minutes, or until the topping is a beautiful golden brown. Remove from the oven and place on a rack to cool completely. If your tart pan has a removable bottom, to unmold, center the tart pan on top of a large can so that it balances midair as the rim of the tart pan falls to the counter. Leave the bottom of the pan under the tart for support, or run a large spatula between the crust and the pan, using the spatula to guide the tart onto a plate. Alternately, cut wedges straight from the pan. Serve with tart whipped cream.

Store the tart covered in plastic wrap, at room temperature for 3 to 4 days. The tart can be assembled ahead and frozen for up to 1 month. Assemble the tart, and then wrap tightly twice in plastic wrap and freeze on a flat surface -- it may require a few minutes extra of baking time.


Monday, February 3, 2014

key lime tart.


Tyler asked for Key Lime Pie for his birthday, so I made him Key Lime Pie because whatever the birthday boy wants, the birthday boy gets even if I wished he asked for something different.  Something involving chocolate and cake and maybe some sprinkles. Something that felt a little more birthday since he's a 29 year old man with an epic year ahead of him.  But this isn't about me, it's about him, and if he wanted Key Lime Pie I was going to make him the best damm Key Lime Pie.

But I didn't make a Key Lime Pie.  I made a Key Lime Tart which is practically the same thing except for the pan and while it didn't involve chocolate or sprinkles, it was pretty awesome.  A homemade graham cracker crust with its strong notes of cinnamon and ginger makes for the perfect base to a lime curd/custard I'm not entirely sure what to call it filling. The filling is tart and refreshing with an amazingly smooth consistency and a zippy finish due to the additional of lime zest.  It wasn't a birthday cake but it made the boy very happy and isn't that the point of a homemade birthday dessert?


Key Lime Tart
Recipe adapted from Martha Stewart

Of course I made some changes.  The original recipe suggested adding more sugar to the filling which I found absurd.  Sweetened condensed milk is sweet enough that you don't need any more sugar.  Omitting the extra sugar results is a tart that's tart but doesn't make your mouth pucker (which is how Key Lime Tart should be).  I also added some zest to the filling for a little added color and an extra dimension of flavor.  I also used homemade graham crackers (my recipe can be found here) because I had some dough in the freezer but store-bought is perfectly fine!


9 to 10 graham crackers (each 2 1/2 by 5 inches)
2 tablespoons sugar
4 tablespoons unsalted butter, melted
1 can (14 ounces) sweetened condensed milk
Zest of 1 lime
3/4 cup fresh lime juice (from 4 to 6 limes)
4 large egg yolks
Pinch salt

Preheat oven to 350 degrees. Process graham crackers and 2 tablespoons sugar in a food processor until fine crumbs form; add butter. Process until combined. Transfer mixture to a 9-inch tart pan with a removable bottom; pat into bottom and up sides. Place pan on a baking sheet, and bake until crust is fragrant and slightly colored, about 10 minutes.

Meanwhile, in a medium bowl, combine condensed milk, lime zest, lime juice, egg yolks, and salt; whisk until smooth. Pour mixture into crust (warm or cool is fine), leaving 1/8 inch at the top; return to oven. Bake until filling is set around edge but still slightly loose in center, 20 to 25 minutes.

Cool completely at room temperature; then refrigerate until chilled, at least 2 hours.