Monday, October 8, 2012

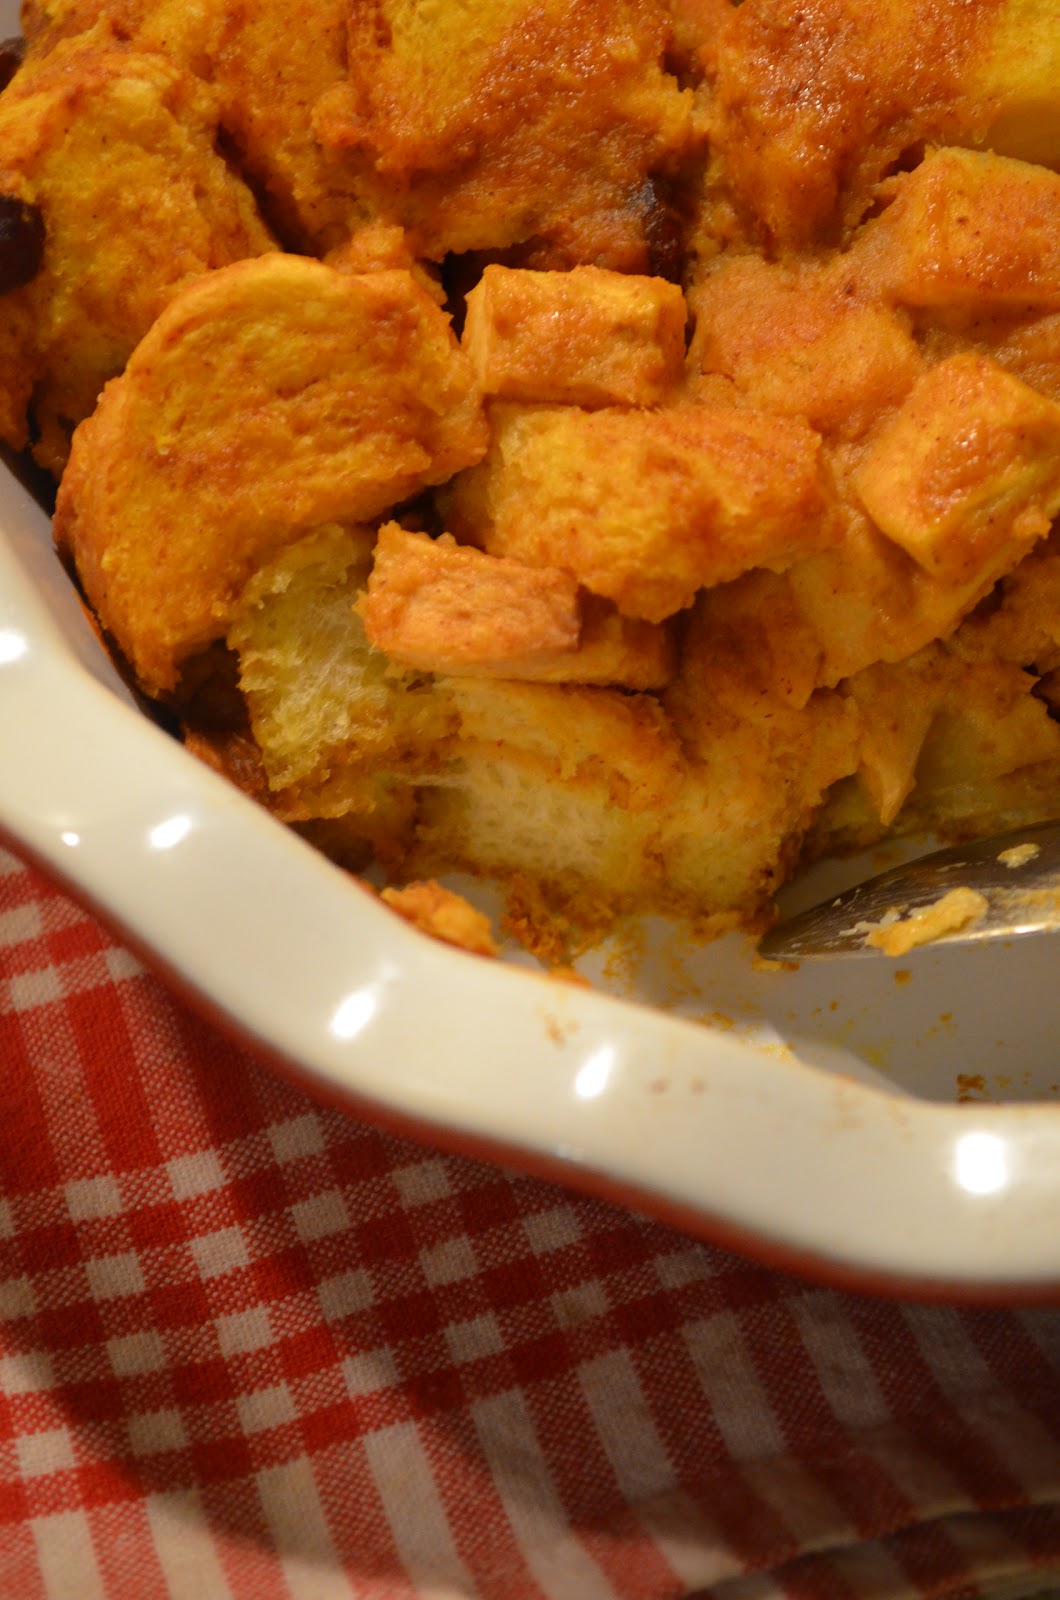
pumpkin bread pudding.


I spent the last hour of my life trying to figure out what to say about this bread pudding and the only thing I could think of is that it’s the most perfect bread pudding and the single best fall dessert.  It’s soft and creamy and spicy and has the perfect amount of textural contrast with the addition of diced apples and dried cranberries.  This begs to be made on a lazy Sunday afternoon with the temperatures are cool and you are craving something warm and cozy.  I love to serve it with a strong bourbon-cider cocktail but a tall glass of milk is just as good if it happens to be made on a school night.    

Be forewarned, the boy and I have been known to polish off almost the entire thing in one evening.  If you manage not to then you have far better self control then us (but I already know everyone has better self control then me).  

Pumpkin Bread Pudding
Recipe adapted from Gourmet

1 ½ cups whole milk (or 1 cup skim milk ½ cup heavy cream)
1 cup canned solid packed pumpkin
½ cup sugar
2 large eggs
¼ teaspoon salt
1 teaspoon ground cinnamon
¾ teaspoon ground ginger
Pinch of ground cloves
6 cups day old baguette or other crusty bread
2 apples, peeled and diced into ½ inch cubes
¼ cup dried cranberries
2 tablespoons unsalted butter

Preheat over to 350 degrees with the wire rack in the middle.  While the oven is preheating, place the butter in an 8 x 8 inch square baking pan or a pie pan and then place the pan in oven for the butter to melt. 

In a bowl toss together the bread cubes, apple, and dried cranberries.  Whisk together the milk/cream, pumpkin, sugar, eggs, salt, cinnamon, ginger, and cloves.  Remove the pan from the oven when the butter is melted and drizzle the butter over the bread cubes.  Then pour the pumpkin mixture over the bread cubes making sure all the bread gets coated.  Transfer the bread/pumpkin mixture to the buttered dish and bake until custard is set, about 25 – 30 minutes.   

Saturday, October 6, 2012

braised chicken with capers and parsley.


I found the perfect Sunday evening dinner recipe.  Actually, my mom (thanks mom!) found the perfect chicken recipe and she served it to me when I was at home and I fell in love.  It has only a handful of pantry staple ingredients and requires a minimal amount of work to make.  The chicken that emerges after cooking is moist and tender (falling off the bone!) and is encased in a sauce that is so perfectly acidic and salty that I found myself licking my plate and using pieces of bread to sop up every last bit.  After spending an entire week thinking about this chicken I decided I needed to make it for myself and see if it lived up to my memories.  Oh did it!  (It really was love at first bite.)  This dish will now be in heavy rotation as it lends itself to fall evenings and cozy meals for two (or a crowd!).  Did I mention how easy it was?  I managed to catch up on my overflowing stacks of Martha Stewart magazines while it simmered on the stove and filled our apartment with the most delicious smell.  

Braised Chicken with Capers and Parsley
Recipe is perfect and comes from Bon Appetit
                                                                                                            
4 tablespoons olive oil, divided
1 large onion, minced (1 ½ cups)
4 chicken legs, drumsticks, and thighs, (or any combination of these pieces as long as it’s about 2 pounds)
Kosher salt
½ cup minced flat-leaf parsley, plus more for garnish
1/3 cup salted capers
2 cups low-salt chicken broth (or homemade!)
1/3 cup white wine vinegar
Freshly ground black pepper

Heat 2 tablespoons oil in a large heavy skillet over medium heat.  Add onion, cook, stirring often, until softened, about 8 minutes.  Transfer oven to a bowl, wipe skillet clean. 

Add 2 tablespoons oil to skillet and increase heat to medium-high.  Season chicken with salt.  Add chicken to skillet and cook, turning once, until golden brown on both sides, 10-12 minutes.  Transfer chicken to plate. 

Add reserved onion, ½ cup parsley, and capers to skillet.  Cook for 1 minute.  Stir in broth and vinegar.  Add chicken with any juices.  Reduce heat to medium-low; cover and simmer until meat is tender and falling off the bone, about 1 ¼ hours. 

Transfer chicken to a large platter.  If you still have a lot of liquid in the pan, increase to high and stir to reduce sauce down a little, about 5 minutes.  Taste sauce, and add more salt or pepper if necessary (I found it needed pepper and not salt).   Spoon sauce over chicken; garnish with parsley.  

Thursday, October 4, 2012

cocktail glasses.

Thanks to my wonderfully amazing friend Ashley, I am now the proud owner of a bar cart which means I've spent the last couple of weeks obsessively checking Etsy in search of the perfect ice bucket, cocktail shaker, and tumblers.  I have a strong affinity for all things vintage and being that my bar cart is from the 70's, vintage accessories seemed necessary.  When I spotted the below cocktail glasses, I purchased them immediately since they are from the 60's, were made in Italy, and have the most amazing colorful pattern I have ever seen.  I can't wait to have friends over for pizza and potent drinks.   


Image via Etsy 

Wednesday, October 3, 2012

breakfast nook.

As a girl who has taken thousands of photos in her life, I have always wondered where I would hang the many photos that I love.  Now that I've found the below picture for inspiration, I have decided a circular breakfast nook is in my future along with a huge white wall for displaying all of the images I love gallery style.  

Oh and that chandelier makes my heart pitter-patter.


Image via Pinterest 

Tuesday, October 2, 2012

batter whole-wheat bread.


Maybe I'm the only person who spends an inordinate amount of time each day thinking about bread, but as of late I've given it a lot of thought, in particular whole wheat sandwich bread.  The thing is, many of the supermarket breads are huge, I'm talking slices the size of my head and it just seems unnecessary (maybe I don't want a sandwich the size of my head) are they are loaded with all sorts of ridiculous sounding ingredients.  All of these thoughts are what led me to analyze my bread consumption and what ultimately led me to my trusty cookbooks to search for an alternative (because there always has to be an alternative).  Low and behold, I found it in Bernard Clayton's bread cookbook (shocking I know).  This is the simplest bread I have ever made.  If you always thought baking bread was scary, this is the bread to try since there is no kneading involved.  The bread that emerges from the over is super tender with a lovely nutty taste; it's safe to say it's the ideal sandwich bread.

Batter Whole-Wheat Bread
Recipe from Bernard Clayton's New Complete Book of Breads.

I halved the original recipe since I would rather have fresh bread more often but you can double it and freeze a loaf.  My ideal sandwich for this bread involves thinly sliced ham, Jarlesburg cheese, and some honey mustard, but I assure you just about any combination is delicious (and it also makes for a rather lovely peanut butter and jelly!) 

Makes one loaf

3 cups whole wheat flour
2 tablespoons sugar
2 teaspoons salt
1 package dry yeast
1 ¾ cups hot water (120 - 130 degrees)

In a large mixing bowl measure the flour and stir in the sugar, salt, and yeast.  Pour in the hot water and stir 50 strokes to blend.  This will be a soft batter, not to be kneaded. 

Using a spatula, scoop the batter into a greased loaf pan (about 8x4).  The batter will fill the pan about two-thirds full.  Wet your fingertips and push the batter into the corners, and to smooth. 

Cover with wax paper or plastic wrap and leave at room temperature to double in volume - but no more - about 30 minutes. (Don't let it rise longer or the batter will fall during baking!)

Preheat the over to 400 degrees 20 minutes before baking.  Bake in a hot oven for about 15 minutes and then reduce heat to 350 degrees for an additional 45 minutes or until the loaves test done (can test by inserting a metal skewer and if it comes out clean it's good). 

Remove the bread from the oven, remove bread from the pans, and let cool on a wire rack before serving. 

Monday, October 1, 2012

fried sushi cakes with tuna, avocado, honey soy sauce, and sriracha mayonnaise.


I have an requited love affair with ethnic supermarkets.  Growing up, my parents would throw my siblings and me into the car for weekend excursions to ethnic enclaves.  We would spend Sunday afternoons in Astoia, NY at the Greek supermarket Titan Foods and Saturday mornings in the Bronx walking along Arthur Ave in search of fresh pastas and pounds of Parmesan.  When I travel, I always make an effort to find and explore the local food markets.  It’s an unbelievable way to understand, see, and taste a communities culture which is why this past Saturday they boy and I made a road trip to Edgewater, NJ to visit Misuwa, one of the largest Japanese markets.  What prompted this visit was the search for sashimi grade fish in order to make these sushi cakes, which I read about on the NYTimes (and felt the need to make immediately).  The trip was well worth it because these sushi cakes are one of the best things I have ever  made.  The flavor is spot on, the creamy spicy mayo pairs beautifully with the salty sweet honey soy sauce and the texture is fantastic (crunchy rice and creamy avocado!).  The quality of the tuna was so incredible that it elevated the whole dish.  I served this with a bottle of cold sake which made for the most perfect pairing and am now looking for every excuse to make a return trip for more fish.  

Fried Sushi Cakes with Tuna, Avocado, Honey Soy Sauce and Sriracha Mayonnaise
Recipe adapted, from the NYTimes

I halved the original recipe, so I ended up making 12 pieces for the two of us (below is my version to serve 2).  I found that this was enough for us for dinner (I think this would also be good with some roasted eggplant as a side dish if you were a little hungrier).  As I mentioned I went out and got the fish from Mitsuwa (I also read online that you can get good sashimi grade fish from the Lobster Pound in the Chelsea Market but I urge you to visit Mitsuwa as it’s utterly fascinating and totally worth the trip.)  It is imperative that you get the best possible fish you can and if you can’t get sashimi grade you could use shrimp or crab or keep it vegetarian with just avocado!   Don’t be discouraged by the length of this recipe and the number of steps, its far easier then it looks! 

For the Rice Cakes

¾ cups short-grain sushi rice
2 tablespoons rice wine vinegar
1 inch piece grated ginger
2 teaspoons salt

For the Sriracha Mayonnaise

½ egg yolk (I put the whole egg yolk into the bowl and divided it which worked)
½ teaspoon red wine vinegar
¾ teaspoon orange juice
1 teaspoon lime juice
2 teaspoons Sriracha
½ teaspoon salt
¼ cup + 2 tablespoons grapeseed oil
2 tablespoons olive oil

For the Honey Soy Sauce

¼ cup light soy sauce
¼ cup honey
1 tablespoon sherry vinegar
2 teaspoons rice wine vinegar

For Frying and Assembling

Rice flour or all-purpose flour for dredging
Grapeseed oil
Coarse Salt
¼ pound sashimi grade tuna, cut into 12 slices
¼ of an avocado sliced into 12 pieces
Chives for garnish

Combine sushi rice, rice wine vinegar, ginger, and salt in a medium saucepan with 1 ½ cups water and bring to a boil.  Cover with a lid and reduce to a simmer.  Cook for 20 minutes or until done (mine took about 26 minutes). Remove from heat and let sit for 15 minutes. 

Line a loaf pan (about 9x5) with plastic wrap.  Firmly press the rice into the pan.  Refrigerate until set, preferably overnight.  Remove the rice from the pan and, using a chef’s knife dipped in hot water to prevent sticking, cut into roughly 1-by-3-inch rectangles. 

Make the Sriracha mayonnaise: Combine the egg yolk, red-wine vinegar, orange juice, lime juice, Sriracha, ½ teaspoon salt, and 1 teaspoon water in a metal bowl.   Slowly whisk in the grapeseed oil and then whisk in the olive oil.  Whisk until smooth, thick, and creamy. 

Make the honey soy sauce: In a small saucepan, bring the soy sauce, honey, sherry vinegar, and 1 tablespoon rice-wine vinegar to a boil and stir until smooth.  Cool before using.

Heat grapeseed oil in a pan, deep enough to just cover the rectangles.  Allow the oil temperature to reach 350 – 360 degrees.  Dredge the rice rectangles in flour and cook until golden and crispy, about 5 minutes total, turning once; transfer to paper towels. 

Top each rectangle with a bit of the mayonnaise, the top with tuna and avocado.  Drizzle with honey soy, then garnish with a bit of chives and a tiny pinch of salt.