Tuesday, February 11, 2014

a (wedding) tangent.

I'm going on a food tangent today.  

In the 2 months since getting engaged I've become a ball of stress so much so that I have questioned my own sanity and whether or not having a wedding is really worth it.  I know this is not typical. That as a girl I am supposed to have an ingrained desire to plan the most romantic day of my life.  I am supposed to dream in tulle and pink roses and get butterflies when I think about our first dance.  In actuality all I think about is how much I can't stand large floral centerpieces and that Tyler and I are the worst dancers ever.  (No really.  I lack all sense of rhythm and well Tyler lacks the ability to move in a fluid manner.)   


I keep asking myself if this is how it's suppose to be.  If there is a better way.  On my mile long walks to and from work, I make plus and minus lists in my head where I debate the points of having a small City Hall wedding followed by a decadent meal at Eleven Madison Park vs. having the larger rustic/industrial wedding that I've always envisioned.  I wonder to myself whether or not I have gotten caught up in the hype that seems to be generated by an industry that looks to convince you that if you don't have wood farm tables and peonies at your wedding that you are a failure and will never be on Style Me Pretty.  I wonder if I would be happy forever being engaged.  

When I think about the costs, the dollars we will spend to have this day, I get queasy.  I feel nauseous.  I almost throw up.  I wonder to myself if it's really worth Tyler and I emptying a good chunk of our savings on one day.  I wonder how others do it.  Do they go into debt for a wedding?  Do their families pay for the entire thing?  Do they simply go to City Hall followed my burgers at Shake Shack and call it a day?  At the end of it all, are they happy with the decision that they've made?  At the end of the day will I be happy with anything less then what I've envisioned?  

I don't enjoy being the center of attention.  I stress about people spending money on me.  I value others happiness over my own.  I've finally realized that this thing isn't about just us but about everyone else as well.  I can't imagine not having all of the people who have known us before we were us, all the people who met us as we figured us out, and all the people we've met over the last couple of years not being there.  They are a part of our larger story.  They are the reason we've reached this point.  They are as integral to this wedding as Tyler and I are.  That is why at this exact moment I am going through 12 years worth of music in an attempt to remind myself why I want what I want.  There is a reason why I want to dance with my friends and family until 2 in the morning and the reason is that I want to celebrate.  I want Tyler and I to start this next stage of our lives with a really epic party.  A party people will talk about for years and years to come.  A party we will talk about, reminisce about, for years to come.

I know when we reach the forgone conclusion of how this day, this momentous occasion will be handled, that it will make sense.  That I will wonder why I stressed so much.  That all the pieces will have actually fallen into (perfect) place. As long as at the end of all this (however it ends), I get to marry the guy who for the past 8+ years has made me deliriously happy, we'll then I'll know it was worth it.  (Because isn't that the point?)

Let's just hope I make it to that point.  

(Tomorrow, we will talk about food again.)  

Image via the ever reliable Pinterest.  

Monday, February 10, 2014

sweet and salty brownies.


A couple of years ago, I went to a holiday party where a charming, adorable, clearly talented boy brought these brownies.  I ate one.  And then I ate another one.  And then I stationed myself next to the plastic container of brownies giving evil eyes to everyone that dared to take one of my brownies.  At the end of the night I stuffed all the remaining brownies into my purse and coat pockets and brought them home (no shame).  

I waited all of 12 hours before asking for the recipe. After getting it, I waited all of 24 hours before I set out to make them myself. (I can't believe I waited that long.)

These brownies are addicting (I think I demonstrated the truth of this statement based on my aforementioned behavior).  They are dark, rich, dense and fudgey (aka my dream brownie).  Coupled with a caramel that's sweet, salty, and subtly tangy (you can thank the sour cream for that) and you basically have a recipe for the best brownie ever.  I adore baking them around Valentine's Day because everyone loves chocolate, caramel, and salt (if you didn't I would question your sanity), they store incredibly well (so you can make them today and share with your loves on Friday), and they ship brilliantly which means your Valentine's both near and far can taste the love. 

But might I suggest you hand out the recipe as well.  Everyone will thank you.  


Sweet and Salty Brownies

A couple of things to note.  You do not want to touch/remove/eat these brownies until they are 100% cool.  They will fall apart and you will be sad about this.  I recommend letting them cool in their pan and then placing them in the fridge for a couple hours (or overnight which is ideal) before cutting them.  Doing so makes slicing them a breeze.  Everyone will think you are a professional and you will be very happy.  This recipe makes a lot of brownies.  I freeze the extras and have been known to eat them straight from the freezer.  They are magical when cold.  Also, this recipe makes more than enough caramel for the brownie assembly. Use the extra to serve with the brownies or to make awesome brownie ice-cream sundaes (Best. Idea. Ever.). 

For the Caramel 

1 cup sugar 
2 tablespoons light corn syrup 
½ cup heavy cream 
1 teaspoon fleur de sel 
½ cup sour cream 

For the Brownies 

1 ¼ cup flour 
2 tablespoons unsweetened cocoa powder 
1 teaspoon fleur de sel 
11oz dark chocolate, chopped (I used Valrhona) 
1 cup (2 sticks) unsalted butter, cut into cubes 
1 ½ cups sugar 
½ cup packed light brown sugar 
5 large eggs at room temperature
2 teaspoons vanilla 

To Finish 

1 ½ teaspoons fleur de sel 
1 teaspoons coarse sugar (i.e. Demerara  or Turbinado sugar) 

Make the caramel: In a medium saucepan combine the sugar, corn syrup, ¼ cup water and stir together carefully. Cook this mixture over high heat until an instant read thermometer reads 350F OR until the mixture is dark amber in color (6-8 minutes). Watch this carefully as it will go from amber to burnt in a matter of seconds.  Remove from heat and slowly add the cream (be careful it will bubble up), then the salt, then the sour cream.  Set aside to cool. 

Note: This recipe makes more than enough caramel for the brownie assembly. Use the extra to serve with the brownies or to make awesome brownie ice-cream sundaes. 

Preheat oven to 350, line a 9x13 glass or light colored metal baking dish with buttered parchment .

For the brownies: In a medium bowl whisk the flour, salt and cocoa powder 

Put the chocolate and butter in the bowl of a double boiler set over simmering water and stir occasionally until chocolate and butter are melted. Take the bowl from the heat, add both sugars and whisk until thoroughly combined. 

Add three eggs to the mixture and whisk until just combined, add the remaining eggs and vanilla. 

Sprinkle the flour mixture over the chocolate mixture and fold to combine, do not overbeat or your brownies will be cakey instead of fudgy. (Trust me, you do not want this.) 

To assemble: Pour half of the brownie mixture into the prepared pan and smooth the top with an offset spatula. Drizzle about ¾ - 1 cup of the caramel over top while being careful to make sure the caramel doesn't come into contact with the edge of the pan. Gently spread the caramel into an even layer using your offset spatula. Finish by topping the caramel layer with big dollops of the remaining brownie batter and gently smooth the top. 

Bake the brownies for 30 – 40 minutes, rotating the pan halfway through. The brownies are done when a toothpick inserted into the center comes out with a few moist crumbs. (Mine took about 38 minutes.  I started checking at 30 minutes and continued to check every 2 -3 minutes after that). 

After removing the brownies from the oven, sprinkle them with the fleur de sel and coarse sugar. 

Cool completely before cutting and serving.


Thursday, February 6, 2014

doughnuts on the brain.

I have doughnuts on the brain.

It started about 2 weeks ago when I got it in my head that we have to have doughnuts at our wedding (this would be in addition to the wedding cake, cookies, and knowing me, homemade pie).  I keep envisioning a tower of glazed orange (grapefruit/lemon) and pink (passionfruit with cocoa nib) doughnuts served on a beautiful white cake stand. This image will not leave my head. 

This doughnut craving wont be going anywhere until I consume about half a dozen, so the weekend plan includes making a visit to the Doughnut Plant or perhaps Dough in Brooklyn or if the snow gets the best of me, it may be time to finally tackle the homemade doughnut (both yeasted and cake, duh).  

(This is a picture of the pistachio doughnuts from the Doughnut Plant on 23rd street.  They were damm good and I wish I had some right now.)

Wednesday, February 5, 2014

jalapeno flour tortillas.


Do you know how many ridiculous ingredients are in flour tortillas from the supermarket?  A lot. I know this because I have a slightly absurd obsession with reading labels in order to better understand some of the ingredients that get added to the simplest of foods.  Out of principle, I don't buy bread that contains 2 inches worth of ingredients.  If I want bread I bake it or I buy it from the awesome French bread shop down the street from my apartment (hi Choc-o-pain!) or I buy Bread Alone bread since they don't add all of that extra junk.  

For a while I struggled with what to do about flour tortillas because there is a certain level of convenience associated with tortillas from the supermarket.  But after another week of wondering why I needed to eat something with azodicarbonamide in it (which is apparently a dough conditioner according to Google and is also used to make yoga mats YUM), I decided to finally tackle the flour tortilla at home and after doing so, I wondered why I waited so long.  These homemade tortillas ate the tenderest version I have ever encountered and FAR superior to anything you can purchase in the stores. They are oh so fluffy and perfect for everything from bean and cheese quesadillas to steak fajitas.  Once you make them once, you'll find yourself looking for things to stuff in them.  

Jalapeno Flour Tortillas 
Recipe adapted (barely) from the Homesick Texan

The original recipe called for roasting a chile and while I normally would have done that, it was cold and I didn't feel like visiting the supermarket for the 10th time that weekend so I added some diced jalapenos and that worked beautifully, just pat them dry before adding them to the dough. The jalapenos can be omitted if you so desire but they make an excellent addition especially if you are using the tortillas for breakfast burritos.  

¼ cup pickled jalapenos, diced small
2 cups all-purpose flour, plus more for rolling
1 teaspoon baking powder
1/2 teaspoon kosher salt
1/4 cup canola or vegetable oil
3/4 cup warm water

To make the tortillas, in a medium bowl stir together the flour, baking powder, and salt until well combined. Stir in the diced jalapeno until well distributed. Pour in the oil and warm water, and stir until a soft dough is formed (if it feels too wet, you can a more flour, a tablespoon at a time.) Cover the dough and let it rest for 1 hour. 

After an hour, divide the dough into 8 balls. Lightly flour a clean surface and one at a time place a dough ball on the floured surface, pat it out into a 4-inch circle, and then roll with a rolling pin from the center until it’s thin and about 8 inches in diameter. If the jalapeno fall out of the dough as you roll, pick them up and then lightly press them in the center of the tortilla, flip the tortilla, and then continue rolling. 

Keep the rolled-out tortillas covered until ready to cook. 


In a dry cast-iron skillet heated on medium high, cook for 30 seconds on one side, flip it and then cook for 1 minute on the other side. It should start to puff a bit. Flip it again and cook for 30 seconds more. Place cooked tortillas in a basket lined with cloth. Repeat process for remaining balls of dough. 

These will keep refrigerated for 1 week. 


Tuesday, February 4, 2014

blush.

Blush is my latest obsession.  

(Anyone know where I can find a leather jacket in this perfect shade of pale pink?)

It's breathtakingly beautiful when paired with green, gold, and graphic lines.  

But I adore it with black for a little edge.  


Image via Pinterest.

Monday, February 3, 2014

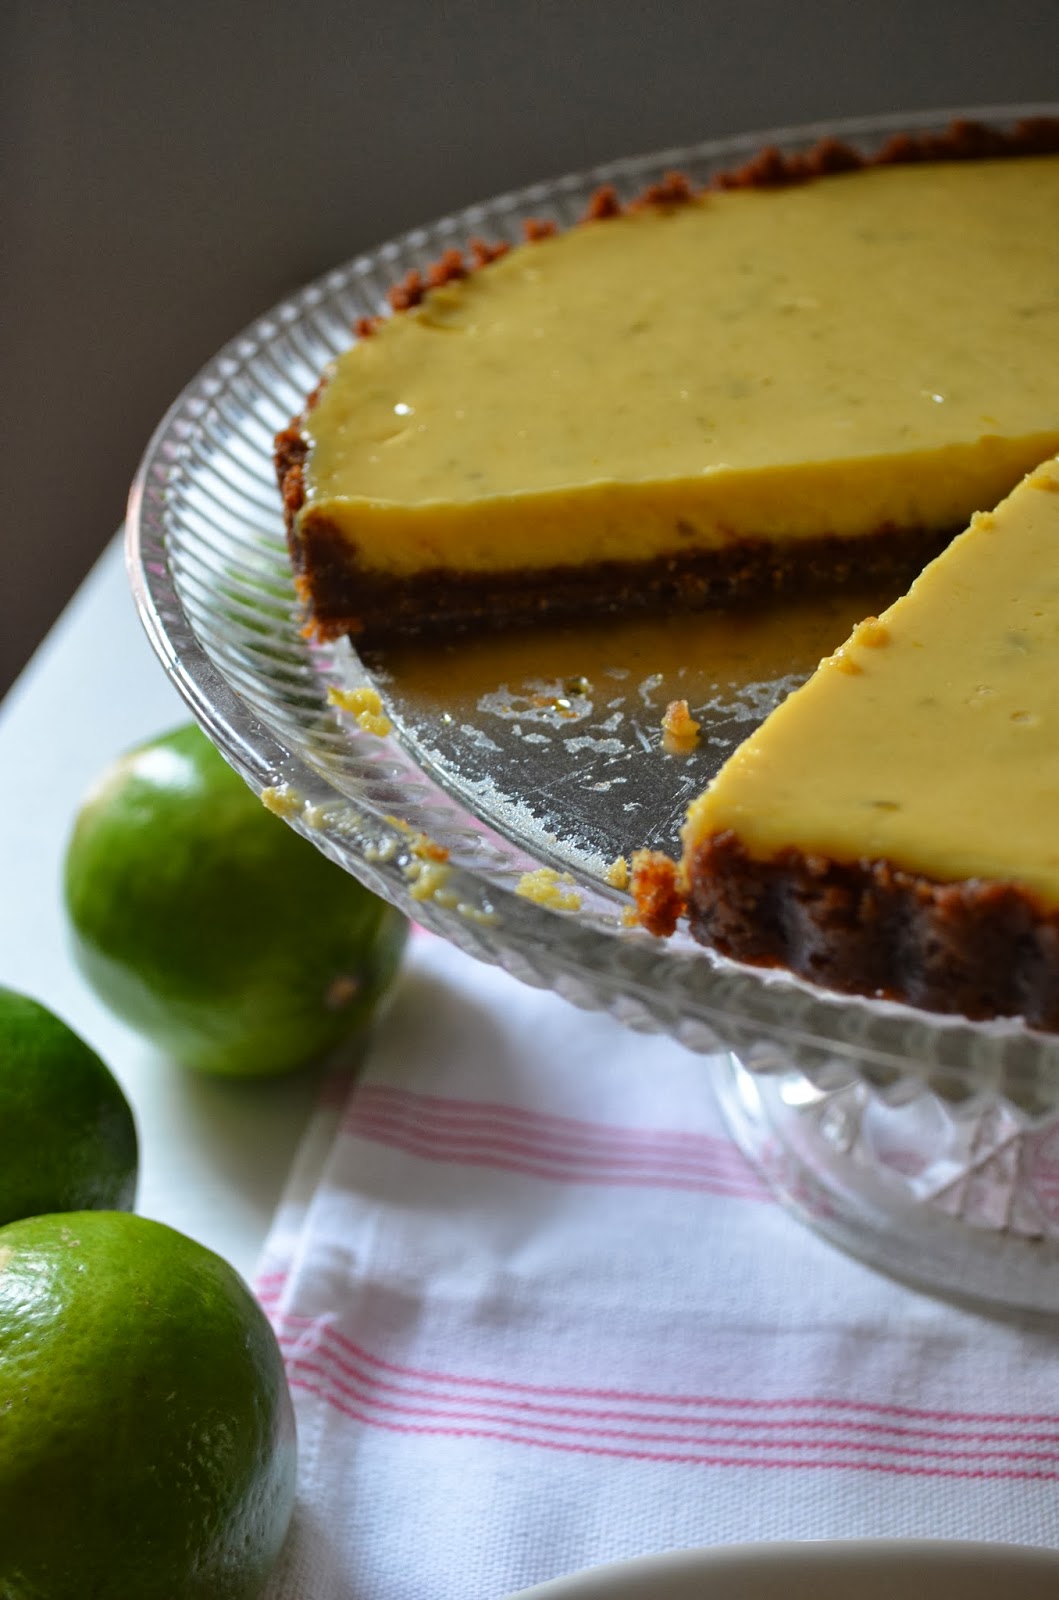
key lime tart.


Tyler asked for Key Lime Pie for his birthday, so I made him Key Lime Pie because whatever the birthday boy wants, the birthday boy gets even if I wished he asked for something different.  Something involving chocolate and cake and maybe some sprinkles. Something that felt a little more birthday since he's a 29 year old man with an epic year ahead of him.  But this isn't about me, it's about him, and if he wanted Key Lime Pie I was going to make him the best damm Key Lime Pie.

But I didn't make a Key Lime Pie.  I made a Key Lime Tart which is practically the same thing except for the pan and while it didn't involve chocolate or sprinkles, it was pretty awesome.  A homemade graham cracker crust with its strong notes of cinnamon and ginger makes for the perfect base to a lime curd/custard I'm not entirely sure what to call it filling. The filling is tart and refreshing with an amazingly smooth consistency and a zippy finish due to the additional of lime zest.  It wasn't a birthday cake but it made the boy very happy and isn't that the point of a homemade birthday dessert?


Key Lime Tart
Recipe adapted from Martha Stewart

Of course I made some changes.  The original recipe suggested adding more sugar to the filling which I found absurd.  Sweetened condensed milk is sweet enough that you don't need any more sugar.  Omitting the extra sugar results is a tart that's tart but doesn't make your mouth pucker (which is how Key Lime Tart should be).  I also added some zest to the filling for a little added color and an extra dimension of flavor.  I also used homemade graham crackers (my recipe can be found here) because I had some dough in the freezer but store-bought is perfectly fine!


9 to 10 graham crackers (each 2 1/2 by 5 inches)
2 tablespoons sugar
4 tablespoons unsalted butter, melted
1 can (14 ounces) sweetened condensed milk
Zest of 1 lime
3/4 cup fresh lime juice (from 4 to 6 limes)
4 large egg yolks
Pinch salt

Preheat oven to 350 degrees. Process graham crackers and 2 tablespoons sugar in a food processor until fine crumbs form; add butter. Process until combined. Transfer mixture to a 9-inch tart pan with a removable bottom; pat into bottom and up sides. Place pan on a baking sheet, and bake until crust is fragrant and slightly colored, about 10 minutes.

Meanwhile, in a medium bowl, combine condensed milk, lime zest, lime juice, egg yolks, and salt; whisk until smooth. Pour mixture into crust (warm or cool is fine), leaving 1/8 inch at the top; return to oven. Bake until filling is set around edge but still slightly loose in center, 20 to 25 minutes.

Cool completely at room temperature; then refrigerate until chilled, at least 2 hours.