recipes.

Wednesday, January 29, 2014

coconut milk and miso creamed kale with salmon.


I waited until the end of the month to make the statement that this is the best thing I ate during the month of January.  It was a dish that was created on a whim without a recipe or anything more then a "let's try this and hope it doesn't taste like garbage like some of your other experiments".  It doesn't involve any of my most favorite things (namely dark chocolate! bread! or cheese!!).  It can qualify as health food and yet it it's the dish we've eaten three times this month and have found utterly satisfying each and every time (which usually only happens when I am eating avocado toast and scrambled eggs followed by a chocolate almond croissant).  

This is a 5 ingredient (mostly pantry items) meal that basically cooks up in well under 15 minutes making this the single best thing you can make during the week when you have minimal time but are looking for something utterly amazing to eat.  The combination of coconut milk and miso may be my new favorite pairing especially when simmered together with chopped kale.  As the kale cooks and the coconut milk and miso simmers it thickens up to create a creamy base that is similar to a umami-bomb creamed spinach.  Paired with wild salmon that cooks atop the creamed kale and emerges from the pan perfectly flaky gives you have the best dinner ever.  

Coconut Milk and Miso Creamed Kale with Salmon

Serves 3 or 4 depending on how much salmon you buy.  

1 large bunch of kale, stems removed and chopped (about 12 cups) 1 can (13.5 ounces) of full-fat well-shaken coconut milk
2 tablespoons white miso
3/4 - 1 pound wild salmon fillet cut into or 4 pieces
Salt and pepper to taste
Lime wedges to serve
Sesame seeds for sprinkling (optional)

Heat a large saute pan over medium heat.  Pour the coconut milk into the pan and add kale.  (It will look like A LOT of kale but it will shrink down quickly.)  Stir to combine with the milk.  Allow kale to wilt and coconut milk to thicken, stirring on occasion, for about 5 minutes.  Stir in the miso.  

Salt and pepper the salmon to taste and place the salmon, skin side down over the kale.  Turn the heat down to low and cover the pan.  Cook until the salmon is cooked through and beginning to flake, about 5 minutes.  To serve place 1/3 to 1/4 of the kale mixture on the plate and top with the salmon.  Sprinkle with sesame seeds if desired. Serve with wedges of lime.  


Tuesday, January 28, 2014

big day inspiration.

I have spent an ungodly amount of time on the black hole that is known as Pinterest.  It starts innocently enough with a single click on a single picture and before you know it an hour of your life is gone and all you have to show for it is a collage of images of bedrooms, kitchens, clothing, and weddings that are all unrealistically perfect and completely unattainable for the common (wo)man.  

Despite its ability to take control of your life, it really is a useful tool, especially when you are in the process of planning a wedding and you really have no idea what it is that you want.  At least I thought I had no idea what I wanted and then I realized once I started looking at all the images I pinned that a theme had emerged. Below are some of my favorite pictures/shots/ideas that I imagine will be my jumping off point for the big day.   

As you can imagine there is a lot of gold, white, and wood.  Maybe I am super predictable.  


All images via Pinterest.

Monday, January 27, 2014

sweet and salty dark chocolate and coconut granola.


In an act of desperation that occurred last week, I found myself spending an inordinate amount of money on a bag of Brooklyn made granola because I was hungry and because it didn't contain a plethora of ingredients that I couldn't pronounce.  I walked to work that morning feeling immensely guilty wondering how someone who calls herself a cook could have been suckered into purchasing something that I could easily make for about a quarter of the price and end up with double the amount.  Then I heard my stomach growl and I remembered the reason.  

Rather unsurprisingly, the granola was ridiculously good.  The jury is still out on whether or not that justifies the price but it made me feel a little bit better about spending my money on it.  (And now that I think about it, purchasing some also supports a local business so maybe it was a good use of my money.) Regardless of all that, purchasing it was a one time thing (or so I hope) and this weekend I set out to rectify the situation but making my own batch because isn't imitation the sincerest form of flattery?  

This granola is everything I want to eat in the morning.  Slightly salty, slightly sweet with a plethora of shredded coconut and some flaked chocolate to make it feel as if you are really indulging.  I'm partial to eating it by the handful in between conference calls but when I have the chance (and the time) to really enjoy breakfast, I find it best when served with milk and sliced banana or yogurt and diced mango.  

Sweet and Salty Dark Chocolate and Coconut Granola
Recipe inspired by the Early Bird Granola 

Granola is one of those things that I can't understand why people buy (I'm looking at myself when I make that statement).  You can make a batch on Sunday and have it last you about 2 weeks!

4 cups rolled oats
1 1/2 cups unsweetened flaked coconut (or unsweetened coconut chips)
1/2 cup light brown sugar
1/3 cup maple syrup
1/3 cup olive oil
3 teaspoons salt
3/4 cup chopped 72% dark chocolate 

Preheat over to 300 degrees.  In a large bowl combine the oats, flaked coconut, and salt.

In a small saucepan over low heat, warm the sugar, maple syrup and olive oil until the sugar has just dissolved, then remove from heat. Pour the liquid over the oats, stirring to make sure all of the dry ingredients are coated with with liquid mixture.  

Line a large rimmed baking sheet with a silicone baking map or parchment and spread granola over it.  Bake until dry and lightly golden, about 35 - 40 minutes, stirring granola a few times a long the way.

Remove granola from oven and allow to cool.  When cool, fold in the chocolate and then store in an air-tight container.  Granola will keep for about 2 weeks in an air-tight container (but I guarantee it wont last that long). Makes about 6 cups. 


Friday, January 24, 2014

lemon cake.


Every year, like clockwork I spend January going on an absolute citrus binge.  It starts innocently enough with a box of Spanish clementines purchased for the awesome price of $6.99 during the first week of January and then it usually manifests into something akin to me lugging 18 pounds of grapefruits, blood oranges, and Meyer lemons, from Whole Foods onto the subway because I just can't resist (I will never be known for my excellent willpower). 

The only logical thing to do when you are starring at bowls and fridge drawers filled with Meyer lemons is make a lemon cake since we might as well use as much lemon as possible.  This cake does just that since its a combination of lemon zest, lemon juice, lemon syrup, lemon glaze, and if you want to take things to a whole other level then there is also candied lemon (go big or go home) .  You would think eating a slice would make your mouth pucker like nothing else but really, it's surprisingly mellow due to the addition of buttermilk which lends a brilliant level of tang and moistness to the cake. I suggest serving with a cup of afternoon tea in an attempt to chase away the (bitterly) cold winter blues.  


Lemon Cake
Recipe from Ina Garten 

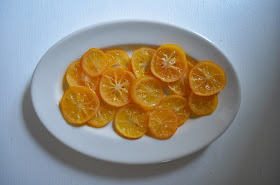
The only change I made her was to halve it (because I really don't need 2 cakes lying around especially with a wedding coming up) and baking it in a cake pan instead of a loaf pan since I think it makes for a prettier presentation.  The candied lemon recipe can be found here.  They aren't necessary but who can resist something so beautiful. Not to mention candying lemons is super easy.  This cake allows Meyer lemons to shine so if you can get your hands on them this is the place to use them but regular lemons work just as well.  

For the cake

1 stick unsalted butter, at room temperature
1 ¼ cups granulated sugar, divided
2 large or extra-large eggs, at room temperature
5 – 6 tablespoons grated lemon zest (3 to 4 large lemons)
1 ½ cups flour
¼ teaspoon baking powder
¼ teaspoon baking soda
½ teaspoon kosher salt
¼ cup + 2 tablespoons freshly squeezed lemon juice, divided
¼ cup + 2 tablespoons buttermilk, at room temperature
½ teaspoon pure vanilla extract

For the glaze

1 cup confectioners' sugar, sifted
2 tablespoons freshly squeezed lemon juice

Preheat the oven to 350 degrees F. Grease and flour one (8 1/2 by 4 1/4 by 2 1/2-inch) loaf pans or one 9 inch round cake pan. You may also line the bottom with parchment paper, if desired.

Cream the butter and 1 cup granulated sugar in the bowl of an electric mixer fitted with the paddle attachment, until light and fluffy, about 5 minutes. With the mixer on medium speed, add the eggs, 1 at a time, and the lemon zest.

Sift together the flour, baking powder, baking soda, and salt in a bowl. In another bowl, combine 2 tablespoons lemon juice, the buttermilk, and vanilla. Add the flour and buttermilk mixtures alternately to the batter, beginning and ending with the flour. Pour the batter into the pan, smooth the top, and bake for 45 minutes to 1 hour (if a loaf) or about 30 – 35 minutes (if using a cake pan), until a cake tester comes out clean.

Combine ¼ cup granulated sugar with ¼ cup lemon juice in a small saucepan and cook over low heat until the sugar dissolves. When the cakes are done, allow to cool for 10 minutes. Remove the cake from the pan and set it on a rack set over a tray, parchment, or sheet pan; spoon the lemon syrup over them. Allow the cakes to cool completely.

For the glaze, combine the confectioners' sugar and the lemon juice in a bowl, mixing with a wire whisk until smooth. Pour over the tops of the cakes and allow the glaze to drizzle down the sides.


Wednesday, January 22, 2014

chalkboard paint.

All black everything. (Black chalkboard paint is so key in a kitchen.)

(If someone wants to come over and organize my kitchen for me so it looks like this I would be really happy.  And I'll bake you some cookies.)


Image via Pinterest.

Tuesday, January 21, 2014

coconut-lime pork tacos with black beans.


Right now, New York is in the midst of a blizzard named Janus (really who names these things?) which is leaving commuters to battle against sideways snow, great gusts of wind, and slush filled sidewalks.  I made it home (my toes are still frozen but I have high hopes feeling will return to them by the time I finish catching up on Girls) but not before thinking a great deal about moving to the west coast (California I still love you).  I will not do such a thing the number one reason being that fall in New York steals my heart, but don't think I haven't thought a great deal about it.   

While I can't experience sunshine beating down on my face anytime soon (I think April will be the earliest that will happen and even still that's a far ways away), I can shove tacos into my face, sit it front of a portable heater, and drink tequila which is almost as good as actual sunshine (once you're drunk everything is great).  


These tacos are a great winter dish for when you find your insides aching for summer (or at least some warmth). Nothing screams the tropics like ground pork combined with coconut! lime! pineapple! avocado! (I've become an avocado addict).  The spices add the necessary heat and warmth which is something I crave immensely this time of year.  Serve it lots of hot sauce and some tequila and lime and you basically have the beginnings of a really awesome winter party.  

Coconut-Lime Pork Tacos with Black Beans 
Recipe adapted from Food 52

When I initially read this recipe I thought the dish would bring together the world of Thai food and Mexican food onto a flour tortilla and it kind of does that but in a much subtler way then how you would imagine.  The coconut milk provides the subtlest level of sweetness but more importantly keeps the pork moist which in my mind is the most important thing. Being the spice obsessed person that I am, I upped the amount of spices in this dish to cater to my own tastes and flavor preferences.  I think for an entire pound of pork you can use the extra punch of flavors but adjust according to your own tastes.  

Serves 4 to 6

1 pound ground pork
1 small onion, finely chopped
2 large garlic cloves, thinly sliced
Kosher salt and freshly ground black pepper to taste
2 teaspoons ground cumin
2 teaspoons chili powder
1 ½ teaspoons oregano
1 teaspoon paprika
1 ½ teaspoon Spanish smoked paprika
Cayenne pepper, to taste
2/3 cups coconut milk, stirred (full-fat recommended)
3 tablespoons pineapple juice
2 tablespoon freshly squeezed lime juice, from about 1 lime
2 cups or one 15 ounce can cooked black beans, drained and rinsed
Corn or flour tortillas, for serving
1 large avocado, diced or sliced
Other recommended toppings: corn salsa, chopped cilantro, sour cream, shredded cheddar or Monterey jack cheese or cotija cheese, hot sauce 

In a large skillet, heat one tablespoon of olive oil over medium heat. Add onion, garlic, and a large pinch of salt and pepper; cook, stirring occasionally, until they soften, about 3 to 5 minutes. Push the onion and garlic to one side of the pan, and add the cumin, chili powder, paprika(s), oregano, and cayenne. Let sizzle in the pan until they’re toasted and fragrant, about 1 minute, then stir well until the onions and garlic are evenly coated with the spices.

Add the ground pork to the pan. Cook over medium-high heat, breaking up any large chunks of pork and stirring occasionally, until the pork is just cooked through. Season with salt to taste. Remove any excess fat from the pan.

Add the coconut milk; simmer for about 5 minutes until thickened, then stir in the black beans, pineapple juice and 1 tablespoon lime juice and cook for an additional minute or two. Taste and add more lime juice if needed. Adjust the seasoning to taste. You can serve right away, or cover the pan and let the pork gently simmer over low heat.

Using a slotted spoon, divide the ground pork equally among lightly warmed flour tortillas. Serve with lots of avocado and other toppings of your choice.


Monday, January 20, 2014

flour bakery, boston: a review

While I adore Boston for many reasons, the number one reason is Flour Bakery. Flour Bakery is everything I wish that we had in New York.  A friendly neighborhood place that you can go to for a solid breakfast (both gluttonous and healthy breakfast options are available depending on your mood) or an absurdly delicious lunch. (I have an unhealthy obsession with their grilled roasted chicken sandwich with brie, arugula, roasted peppers, and caramelized onions.  It may be my favorite sandwich of all time.  Why do so many places suck at making sandwiches with the perfect ratio of ingredients?  Flour does not suck at making sandwiches which is why I wish I had one right now.  Sorry for that long sandwich rant.)

Let's now discuss the real reason to visit Flour.  Homemade Oreos.  My Oreo obsession reached an all time high after I had one from Flour for the first time. They are larger then then the originals which is probably why I like them so much.  And also because the cookie is a touch more tender making them perfect for splitting in half (if you are nice enough to share which I usually am not).  While I adore the Oreos, I should also mention that their ginger molasses cookie is a game changer (how do they make them so soft and chewy?), the granola bars weigh as much as a small child (chock full of oats and dried fruits making them oh so filling), and their carrot cake is heavenly and the furthest thing from being considered cloyingly sweet.  I have yet to try their entire menu but on each subsequent trip I make an effort to try something new since everything is so good.  If they opened one in New York, I would be insanely happy.  

(I can't rave enough about her cookbook either.  It's my go-to whenever I am looking for a sweet recipe.)

Thursday, January 16, 2014

plants.

I've become obsessed with plants for table decor instead of flowers.  I like the fact that they never die (unless you lack the green thumb like me).  

Encasing them in a square glass like the below up's the chicness and provides a nice rustic edge.    

In other news, wedding planning is tough and I want to elope.  


Image via Pinterest

Wednesday, January 15, 2014

rich buttermilk waffles.


After purchasing this bourbon infused maple syrup for the boy for Christmas, I've spent most weekends looking for ways to incorporate it into our weekend breakfast routine.  This means we've been eating lots of pancakes, french toast, and waffles because there is no better way to get maple syrup into your mouth then via a breakfast (or breakfast for dinner) sweet.  

This is the most classic, go to, amazing waffle recipe ever.  The buttermilk provides a superb level of tang, a flavor that I will forever associate with lazy weekend breakfasts.  The beaten eggs help to provide a crispy, crunchy waffle exterior (who knew beaten egg whites produced such magic) and the yolks provide a fluffy rich interior. The whole wheat flour swap provides some hearty (healthy) nutty heft which is why I love whole wheat flour so much . My favorite way to serve these is with a pat of butter and a whole lot of (bourbon) maple syrup but there are equally delicious with a spread of Nutella or peanut butter and sliced bananas.  

Rich Buttermilk Waffles
Adapted from How to Cook Everything by the most reliable Mark Bittman 


Despite their being 2 of us, I usually make a full batch of these since the boy has a rather strange habit of eating them cold from the fridge. I highly suggest making a full batch and storing the leftovers in the fridge and toasting the leftovers in the toaster when you want some more waffles!  (Because everyone always wants more waffles.)

Serves 4

2 cups all-purpose flour (or 1 cup all-purpose and 1 cup whole-wheat) 
½ teaspoon salt
2 tablespoons sugar
1 1/2 teaspoons baking soda
1 ¾ cups buttermilk or 1 ½ cups sour cream or plain yogurt thinned with ¼ cup milk
2 eggs, separated
4 tablespoons (½ stick butter, melted and cooled)
½ teaspoon vanilla extract
Canola or other neutral oil for brushing on waffle pan or Pam!

Combine the dry ingredients. Mix together the buttermilk, sour cream or yogurt and the egg yolks. Stir in the butter and vanilla.

Brush the waffle iron lightly with oil and preheat it. Stir the wet into the dry ingredients. Beat the egg whites with the whisk or electric mixer (spotlessly clean ones work best) until they hold soft peaks. Stir them gently into the batter.

Spread a ladleful or so of batter onto the waffle iron and bake until the waffle is done, usually 3 to 5 minutes, depending on your iron. Serve immediately or keep warm for a few minutes in a low oven.


Tuesday, January 14, 2014

sputnik.

Loving the statement making nature of this Sputnik light fixture.  Because when you having something this bold, everything else can be very plain and simple and stark white/silver.  

(This light fixture is similar to the one in the dream wedding venue.  I am sensing a theme developing...Maybe it's time to change out the horrific overhead light in our apartment and find one like this.)

I can't get over how well it manages to transform the room.  I'm falling hard.  


Image via Pinterest.  

Monday, January 13, 2014

lamb meatballs with yogurt and pomegranate sauce.


I'm here to make a case for lamb since I don't think it gets the respect it deserves.  Beef and pork get most of the culinary love and it really makes me sad since lamb is rather wonderful.

Most people think of lamb as a spring food but for me it's the essence of winter eating.  Lamb pairs brilliantly with lots of warm Middle Eastern spices, and I find warm spices are best suited for cold wintry evenings.  These lamb meatballs are the best weeknight winter meal ever.  They come together in under 30 minutes, yet they taste as if you spent hours on them.  They exude elegance (the pomegranate sauce make s me swoon, so chic) and they smell so damm good as they cook.  The spice mix used here is assertive yet not overpowering and the yogurt sauce provides a nice bright and tart contrast to the spiced meat.  These work well stuffed in pitas for an easy weeknight dinner but I also love them served atop baby spinach as a substantial and unique salad (the yogurt sauces serves as an excellent salad dressing in that case).  

Lamb Meatballs with Yogurt and Pomegranate Sauce
Recipe adapted from Serious Eats 

Serves 4

For the Lamb Meatballs

1 pound ground lamb
½ cup chopped fresh mint leaves
¼ teaspoon ground cayenne pepper
1 teaspoon ground cumin
½ teaspoon ground coriander
½ teaspoon Aleppo pepper (optional)
1/8 teaspoon ground cinnamon
1 ¼ teaspoons salt
2 cloves of garlic, minced
1 tablespoon oil


For the Yogurt and Pomegranate Sauce

5 ounces Greek yogurt
1 ½ tablespoons milk or water
½ cup pomegranate seeds
¼  cup chopped fresh mint
Kosher salt and freshly ground black pepper
1 teaspoon pomegranate molasses (optional)
½ teaspoon Aleppo pepper (optional)

4 pitas, warmed

For the lamb meatballs: In a large bowl, combine the ground lamb, fresh mint, cayenne, cumin, coriander, Aleppo pepper (if using), cinnamon, salt, and garlic. Mix together with your hands until thoroughly mixed and slightly sticky. Form mixture into 16 balls, approximately two inches wide.

Adjust top oven rack to six inches below the broiler. Preheat broiler to high. Add oil to rimmed baking sheet. Add the meatballs, and roll them around until they are coated in the oil. Arrange in two rows in such a way that they will cook evenly under the broiler element. Transfer pan to the broiler, and cook until meatballs are browned on the top, 4 to 5 minutes. Carefully remove the pan, and use a pair of tongs to flip the meatballs. Return pan to the oven, and cook until browned on the other side, another 4 to 5 minutes. Remove and set pan aside.

For the yogurt and pomegranate seed sauce: In a medium bowl, whisk together the yogurt and milk. When smooth, add pomegranate seeds and fresh mint. Stir well. Season to taste with salt and pepper. Drizzle the pomegranate molasses and sprinkle the Aleppo pepper over the top.  Stuff each pita with about a quarter of the sauce and four of the lamb meatballs. Serve immediately.


Thursday, January 9, 2014

rectangle.

In spending too much time thinking about ridiculous wedding details, I've come to the conclusion that I am only attracted to rectangular tables.  No circular tables for me

Rectangular tables are better for eating family style which in my mind is the only way to eat. 

(Wouldn't mind having an indoor/outdoor space like the below.  This is pure magic.  It's begging for newspapers and croissant crumbs to be strewn over the table top. God I love rectangular tables.)


Image via Pinterest

Wednesday, January 8, 2014

roasted feta with honey.


I think if I could only use one word to describe my eating preferences it would probably be cheese-aholic. I'm not ashamed to admit that I don't usually consider something a meal unless it includes something of the dairy variety.  I am not embarrassed to admit that I can only eat scrambled eggs with grated Gruyere melted in.  I will continue to be vocal about the fact that it is not a pizza unless it includes cheese. (If it doesn't have cheese, it's a flatbread.  Glad we are all on the same page now.).  

After that cheese confession, it seems only natural that we discuss a cheese recipe which means now is a good time to bring up the awesome roasted feta with honey that I made last week before I was infected will the flu. This is the kind of appetizer I dream about.  It exudes fanciness and is one (very easy) step above a putting a wheel of brie on a cheeseboard.  The roasting of the feta softens it, making it spreadable and malleable and perfect for topping crackers with.  The honey balances out the saltiness and the rosemary brings a little earthiness and extra warmth to the plate.  While this makes a great appetizer, I prefer serving it with an arugula salad for a satisfying winter dinner for two.  

Roasted Feta with Honey
Recipe adapted from Food 52

There are so many ways I can adapt this that the sheer amount of possibilities scares me.  Amanda uses thyme instead of rosemary which would be wonderful.  I think a sprinkle of Aleppo pepper or Urfa chiles at the end would be a pretty stellar change.  

One 8-ounce slab Greek feta, blotted dry 
2 tablespoons extra-virgin olive oil 
1 tablespoon honey
Freshly ground black pepper 
1 sprig rosemary, minced (optional)
Greek-style pita bread, toasted and cut into wedges or hearty crackers (I prefer the crackers here)

Preheat the oven to 400 degrees. Select a small oven-to-table earthenware dish or a small ovenproof sauté pan lined with aluminum foil to help transfer the cheese to a plate after roasting. Place the feta in the dish and cover with the olive oil. Bake until the cheese is soft and springy to the touch but not melted, about 8 minutes.

Preheat the broiler. Heat the honey in the microwave or over a pan of simmering water until it is fluid enough to be spread with a pastry brush and then paint the surface of the feta with it. Broil until the top of the cheese browns and just starts to bubble. Season with black pepper and the minced rosemary (if using). Serve immediately with pita wedges or crackers.


Tuesday, January 7, 2014

greenery and gold.

I've got weddings on the brain.  

In particular, the dinning aspect of the wedding.  Obsessing over the below table settings.  It feels chic and sophisticated and utterly appropriate in a industrial space.


Image via Pinterest.

Monday, January 6, 2014

coconut banana bread.


It's been nearly five days and this flu/fever/chest congestion thing I've got going on continues to rear it's ugly head.  The worst part about it is that I have no appetite.  Yes, I don't want to eat which if you know me you know that this is a big deal since I always want to eat (I mean I do write a food blog).  Looking at certain foods makes me physically nauseous which is how I've found myself living on a diet of toast, brothy soups, and simple breads like this (because my desire to cook hasn't gone anywhere).

This is the kind of bread both kids and adults can appreciate. It's flavorful (coconut oil and spices) and moist (coconut milk and smashed bananas) and reminiscent of tropical locations and summer days (only 165 days to summer!).  It's also healthy (OK healthy-ish) and the kind of snacky thing I crave everyday around 3:30 PM with a cup of hot tea.  I imagine if you make this it will disappear from your kitchen as fast as it disappeared from mine.  

Coconut Banana Bread
Recipe adapted from Smitten Kitchen

I made a lot of changes because I'm that person.  Upped the healthy aspect by swapping in some whole wheat flour, added some smashed bananas because we had them on hand and bananas and coconut just always work together, and used coconut oil instead of butter because the more coconut flavor I can add the happier I am.  

Makes 1 loaf

2 large eggs
1 1/4 cups coconut milk (or if you don’t happen to have that exact amount of coconut milk in the fridge like I did 1 cup of coconut milk and ¼ cup of skim works splendidly)
1 teaspoon vanilla extract
1 1/2 cups all-purpose flour
1 cup whole wheat flour 
2 teaspoons baking powder
2 teaspoons cinnamon
1/2 teaspoon ground ginger
1 cup sugar
2 bananas mashed
6 tablespoons (85 grams) coconut oil, melted (butter can also be used)
Vegetable oil or nonstick cooking spray

Heat oven to 350 degrees. In a small bowl, whisk together eggs, milk and vanilla.

In a medium bowl, sift together all-purpose flour, whole wheat flour, baking powder, cinnamon, and ginger. Add sugar and smashed bananas, and stir to mix. Make a well in the center, and pour in egg mixture. Gradually mix with dry ingredients, until just combined. Add melted coconut oil, and stir until smooth. Do not overmix.

Oil and flour an 9 x 5-inch loaf pan. Pour batter into pan. Bake until a toothpick inserted into center comes out clean, 1 to 1 1/4 hours. Cool in pan 5 minutes, remove bread from pan, and finish cooling on a rack.