Monday, April 29, 2013

california eats.

California has stolen my heart or at least stolen my stomach. 


From top left to right. 

Picture 1 and 2 - Roasted tomato salsa and a chile verde burrito from Papalote.  The roasted tomato salsa is absurdly amazing.  I mean I could and would eat it by the bucketful (it would be unbelieveable on an egg scramble which is why I bought a jar to go and carried it around in my purse for the remainder of the day.  Hiking San Francisco hills while carrying a jar of salsa is not recommended .  The burrito was voted best in San Fran and the boy and I were on starvation mode so we got one to share as well.  This thing is the size of your head and has a lot going on.  I personally found it a little overwhelming (maybe that was because I agreed to add avocado, beans and a whole bunch of other things).  I don't think I could ever eat an entire one which says a lot.  

Picture 3 and 4 - La Taqueria.  This is one of those old school, been around forever kind of places (aka the kind of places I love).  The line is long but moves quickly.  The difference between this burrito and the one at Papalote is the fact that they don't use rice.  Just meat and salsa and whatever over add ons you choose.  We had the carnitas burrito as was suggested to me and it was absurdly good.  There was a level of purity to this burrito that was kind of lost on the other one.  The flavor of the meat really came through and you could eat a whole one and not feel like you wanted to die after.  I already informed Tyler we are coming here once more before we leave because I keep thinking about the quesadilla I saw some people eating and now I want one.  

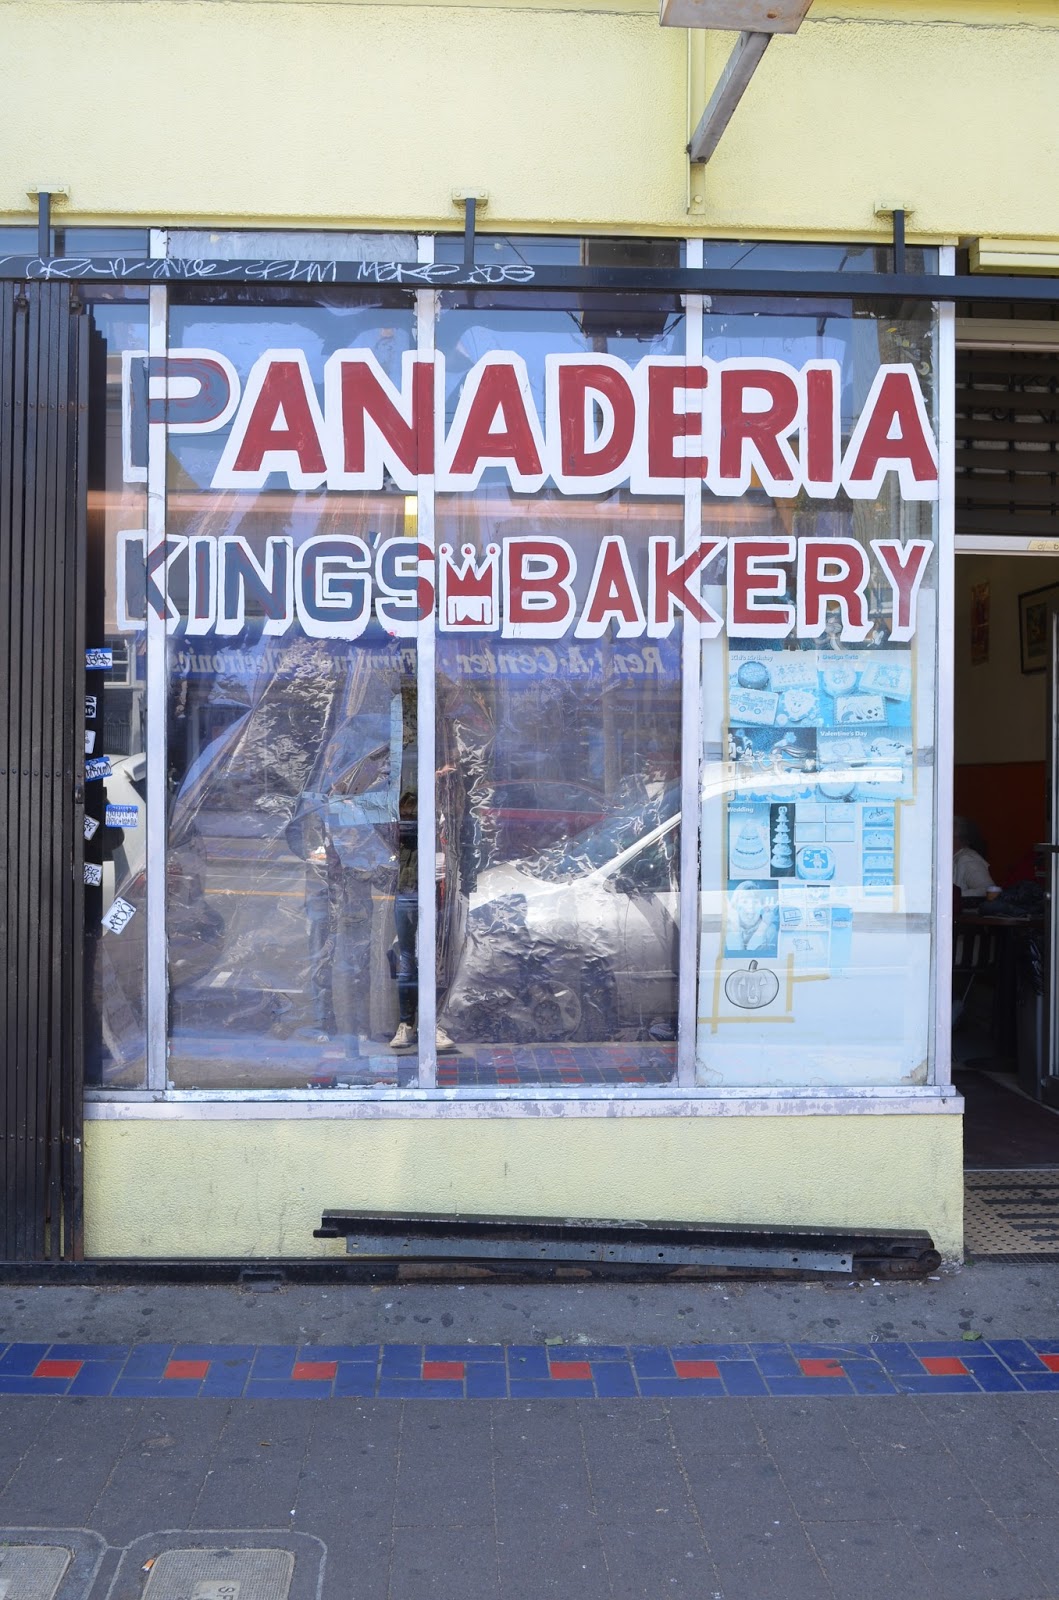
Picture 5 - Kings Bakery was an old school Mexican style bakery, the kind of thing I haven't seen since I was in Mexico City.  In the inside the wall is covered with an array of different breads and pastries.  You pick a plastic tray and a set of tongs and basically load up on whatever you choose.  Nothing is more then 2 bucks and most of the stuff averages out at about 70 cents.  We got the fluffiest sweet bread ever.  The top of the bread was dusted with a nice layer of sugar giving in a nice crunchy bite.

Picture 6 and 7 - Passionfruit croissant and Thai ginger scone from Craftsman and Wolves.  I had read about this place from a post Desserts for Breakfast did a couple months back and then a friend from San Fran also mentioned it and once I hear more then one person tell me about it then I know I have to go.  The inside of this place is basically how I wish my future home would look like (all wood beams, high ceilings, and rustic tables).  The food is incredible.  I have a weakness for any and all things passionfuit so this croissant is pretty much the epitome of everything I love in this world.  It's tender and flaky, sweet and tart.  It's the kind of thing that makes you want to wake up each morning and eat.  The scone bridges the line between savory and sweet in a way that's absolutely perfect.  The green curry balances out the ginger and coconut in the most unusual of ways.  Not everyone would love this (I know Tyler wasn't a huge fan) but it makes you think about how different sweets can be in different cultures.   

Thursday, April 25, 2013

warm glass noodles with edamame.


We are at t-minus 36 hours until we arrive on the west coast which means we are at my least favorite part of getting ready for vacation which is the "I can't buy anything new at the supermarket and can only make dinner using things I have in the fridge and freezer".  I somehow always end up with bits of things in the fridge  as a result of week long random cooking adventures and somehow this problem always exacerbates itself right before we leave on any trip.  My way of dealing with this issue is to make pasta.  I have yet to find a food that you can't combine with pasta. (Pasta is kind of like eggs.  You can eat any food with eggs, that's why they are so perfect.)  This particular pasta dish is a favorite because of it's Asian influence.  There is something about an Asian sauce and the combination of sweet, tangy, salty, and spicy.  The melding of different flavors excites your taste buds  This noodle and edamame dish is unexpected and light and uses basic pantry items which makes it perfect for those nights when you don't know what to make for dinner.  

Warm Glass Noodles and Edamame
Recipe adapted from Plenty by Yotam Ottolenghi

This is one of those dishes that really should just be used as a starting point.  I added in some leftover diced chicken and avocado to this dish as that's what we had in the fridge, but it would also be wonderful with diced carrots and pepper or leftover steak.  Really you can throw anything in.  (But I highly recomend avocado, it's wonderful here.)  

Serves 4

For the Sauce

2 tablespoons hot sesame oil
2 tablespoons fresh ginger, grated
Juice of 1 - 2 limes
2 tablespoons pure rice vinegar
1 tablespoon sugar
1 tablespoon peanut butter (chunky or creamy)
2 tablespoons soy sauce
1/2 teaspoon fish sauce
1 - 2 teaspoons Sriracha 

For the Pasta

7 ounce glass (cellophane) noodles
2 cups shelled cooked edamame
1 fresh chile, finely chopped
1 cup leftover protein or vegetables (if none replace with an extra 1/2 cup of edamame)
3 tablespoons chopped cilantro
3 tablespoons shredded fresh mint

Soak the noodles in a bowl of hot water for about 5 minutes, or until soft (don't leave them in the water too long or they will get soggy).  Drain and leave to dry.

To make the sauce, in a small bowl whisk together all of the sauce ingredients and set aside.  

In a large bowl, add the noodles, edamame, leftover protein, vegetables, mint, and cilantro.  Pour the sauce over the noodles and toss to combine ensuring all the noddles are sufficiently coated.  Serve garnished with more herbs.          

Tuesday, April 23, 2013

white on white.

Looking for something clean and pure.  

Nothing more pure then white.


Image via Pinterest.

Monday, April 22, 2013

spinach and chickpeas.


You may be looking at this recipe and thinking about passing on it.  I know you are because I did the same thing several times, dismissing it because it didn't seem special enough to me (I mean it's spinach and chickpeas I know no one holds those two things in the highest regard).  But after looking at it one too many times and finally having all the ingredients on hand, I decided to give it a go and I kid you not when I say it was one of the best decisions I've ever made.  This is one of the most addicting things I've ever made.  The flavors are incredible - spicy, tangy, and smoky (pretty much my three favorite flavors).  It's easy and satisfying and super filling (but not in a way that makes you feel like you need to take a nap after dinner).  It's kind of perfect and it gets better after a night in the fridge when you allow the flavors to meld making the leftovers the most perfect lunch.   

Spinach and Chickpeas (or for the fancy name Espinacas con Garbanzos)
Recipe adapted from Smitten Kitchen

1/2 pound (230 grams) dried chickpeas, cooked until soft and tender or two 15-ounce cans of chickpeas, drained and rinsed
4 tablespoon olive oil
1 pound (450 grams) spinach, washed
A hefty 1-inch slice from a country loaf, crusts removed and cut inset small cubes
½ cup – ¾ cup tomato sauce
3 garlic cloves, thinly sliced
½ teaspoon ground cumin
Pinch of red pepper flakes
1 ½ tablespoons red wine vinegar
½ teaspoon smoked paprika, plus more for sprinkling
Salt and freshly ground black pepper


To serve: fried bread toasts or a fried egg (I love it with a fried egg, makes it a meal!)

Place a large saucepan over medium heat and add half the olive oil. When it is hot, add the spinach with a pinch of salt (in batches, if necessary) and stir well. Remove when the leaves are just tender, drain in a colander and set aside.

Heat the remaining olive oil in the same saucepan over medium heat. Fry the bread for about 5 minutes or until golden brown all over, then the remaining tablespoon of oil and the garlic, cumin and pepper. Cook for 1 minute more or until the garlic is nutty brown.

Add to the pan the vinegar, smoked paprika, drained chickpeas, spinach and tomato sauce. Stir until the chickpeas have absorbed the flavors and are hot. Season with salt and pepper.

Thursday, April 18, 2013

chocolate-crusted banana blondies.


There is a magic trio of chocolate, caramel, and salt that makes my knees weak. It's fairly safe to say that almost every recipe I come across that is composed of this trifecta ends up being made within a week of me reading it (and truth be told even a week is pretty generous). The most notable of these recipes is the chocolate, caramel, sea salt brownies from the Baked Explorations Cookbook. The first time I had them was at a close friends Christmas party (I remember the first time fondly). Upon first bite I became utterly infatuated (and became even more so with each subsequent brownie I ate). I was so addicted to them that I may have shoved as many as I could into my purse  in an effort to "research" them when I got home (trust me when you try them you will do the same thing).  I got the recipe and decided to make them on my own only to discover this was a process - a (chocolate) labor of love.  So lets just say they are a once a year treat. Nothing has quite fulfilled my love for those brownies until I met these banana chocolate blondies.  The flavor is familiar (butterscotch! chocolate! banana!) but including all of those flavors (along with a sprinkle of flaky sea salt) in a single layered bar cookie is new which is probably why I find them so irresistible.  These would make for a decadent ice cream sundae (or banana blondie split!) but I personally love them with a tall glass of milk after a long day of work.  

Chocolate-Crusted Banana Blondies
Recipe via Melissa Clark at the NYTimes 

At first when I tried the batter (don't tell me no one else tries the batter because then I know you are all lying to me), I was worried these were going to be unbelievably sweet (that statement is shocking coming from me), but once you try everything together (and include the sprinkle of salt) it really all works perfectly.  I also love these cold, everything firms up in a really wonderful way.  

2 1/2 sticks unsalted butter (1 1/4 cups), more for greasing pan
200 grams chocolate wafer cookies (to make about 3 cups crumbs)
55 grams light brown sugar (about 1/4 cup)
3 grams fine sea salt (about 1/2 teaspoon), plus a pinch
2 ripe bananas, mashed
2 large eggs
455 grams dark brown sugar (about 2 1/2 cups)
2 tablespoons dark rum or 1 teaspoon vanilla extract
130 grams all-purpose flour (about 1 cup)
80 grams toasted walnuts, chopped (about 1/2 cup)
Flaky sea salt, for sprinkling

Heat oven to 375 degrees. Line a 9-by-13-inch baking pan with parchment, and grease with butter.

Melt 1 stick of butter in a saucepan over low heat or in microwave. Put the chocolate wafer cookies in the bowl of a food processor and process to make fine crumbs. Add the light brown sugar, melted butter and a pinch of salt. Process until the mixture is the consistency of damp sand. Dump the mixture into the pan and press it into an even layer. Bake for 7 to 10 minutes, or until the surface is firm. Remove the pan and set aside.

Reduce oven heat to 350 degrees.

In a large skillet over medium heat, melt 12 tablespoons butter, then let it cook until the foam subsides and butter turns a deep nut brown, about 5 minutes. Cool.

In a large bowl, whisk together bananas, eggs, dark brown sugar and rum. Whisk in brown butter. In a separate bowl, whisk together flour and fine salt. Fold into batter along with the toasted walnuts. Pour the mixture over the prepared crust and spread evenly. Sprinkle top with flaky salt if using.

Transfer pan to oven and bake until the top is firm and a toothpick inserted in the center emerges with a few crumbs attached (or clean) but not wet, 45 to 55 minutes. Cool completely on a wire rack; cut into 24 bars.

Wednesday, April 17, 2013

new at the market.

Something other then root vegetables has finally shown up at the farmer's markets and upon seeing this I practically wept.  (There is something about the first site of green.)  After a winter that felt longer then most, the arrival of spring (and fresh local produce) has been particularly thrilling.  I live for farmer's markets. (I have on occasion screamed bloody murder for Tyler to stop the car at any sign that advertises berries, tomatoes, and corn (totally normal, right?).  I am also probably the only person who takes the subway during the middle of the work day to our old office in Brooklyn so I can visit my friends from Phillips Farm.  They love me.  The feeling is mutual.)  Considering my downright obsession I figured it seemed only fitting to start documenting the food I purchase each week so people who may not be as familiar with the markets will know what to expect and what they can find.  (Hopefully this will make shopping easier!)  I will also be including as many seasonal recipes as possible (because the whole point of excellent produce is having excellent recipes to use them in.) 

This week marked the arrival of spinach (!!), broccoli rabe, wild arugula, and leeks (how I love thee).  So much green is beautiful.   

Tuesday, April 16, 2013

banana pineapple muffins.


Breakfast is one of those tricky meals that everyone seems to have differing opinions on.  My opinion is that I wish I could eat oversized sticky buns, cheese danishes, and coffee cake every day but I can't because I would end up the size of a jumbo muffin.   So, I stick with safe foods like granola and yogurt, oatmeal, and peanut butter with banana.  As much as I like to convince myself I love my boring, healthy breakfasts (most days I really do), I sometimes find myself starring longingly (probably creeping them out) at my coworkers (who have metabolisms far faster then mine) feasting on the kinds of thing I only wish I could eat.  (Life can be so unfair.)  I scoured the web this past weekend, thinking there had to be a healthy/indulgent muffin hybrid somewhere out there that I had yet to discover and what I discovered is that there really was no middle ground.  There were strussel-topped chocolate filled muffins (over-the top!) and there were bran, flax, seed muffins (for the granola lovers) but not much in between which is where my banana pineapple muffin creation comes in.  These are healthy - chock full of fruit and whole wheat but they also satisfy my innate desire to eat something that tastes indulgent before noon.  Sometimes you can have the best of both worlds which makes me incredibly happy. 

Banana Pineapple Muffins

I wont lie that as I was making these I was super apprehensive of these coming out any good, I mean I was completely winging it hoping something somewhat edible would emerge from the oven.  But luck was on my side on that day and these came out beautifully.  If you hate pineapple you could omit it or replace it with shredded coconut.  You can also replace the cocoa nibs with toasted walnuts but that would be a real shame in my book since I love any excuse to eat chocolate for breakfast.   

Makes 12 muffins (probably 14 if your don't overfill but I love to overfill)

2 large eggs
1 cup milk (coconut milk or regular)
1 cup diced pineapple
1 medium-sized banana, mashed
1 teaspoon vanilla extract
1 1/2 cups whole wheat flour (or 165 grams)
1 cup all-purpose flour (or 150 grams)
1/4 teaspoon salt
2 teaspoons baking powder
1 teaspoon ground cinnamon
3/4 cup granulated sugar
6 tablespoons coconut oil or butter, melted
1/4 cup cocoa nibs

Heat oven to 350 degrees. In a small bowl, whisk together eggs, milk, banana, pineapple, and vanilla.

In a medium bowl, sift together flours, salt, baking powder and cinnamon. Add sugar and and stir to mix.

Make a well in the center, and pour in egg mixture, then stir wet and dry ingredients together until just combined. Add coconut oil/butter and cocoa nibs, and stir until just smooth. 

Butter and flour a 12 cup muffin tin, or coat it with a nonstick spray. Portion batter out in pan and bake until a toothpick inserted into the center comes out clean, anywhere 22 – 30 minutes.  Let cool 5 min in pan and then invert onto a wire rack to finish cooling.  Can be stored in air tight container for 3 days.  

Monday, April 15, 2013

boston.

Boston, I love you.  Stay safe and I can't wait to see you after all of this is over when we can eat a couple of homemade oreos and have a good time.  

My heart breaks.  


Image from here

Saturday, April 13, 2013

swordfish with chile pesto.


I was spoiled (like all New Yorkers) earlier this week when the sun shone bright and the air was warm and I could sit outside for 10 minutes during the middle of the work day to read a book and not need to wear a jacket.  And then psyke! The rains came and the clouds poured in and the temperature dropped so much that I needed to take that heavy black coat back out of the closet and throw it back on in order to leave the house without freezing to death.  (The weather is playing mean games with my head.)  Those few days of warmer weather convinced me that spring produce was coming.  That I was just a few short days away from seeing asparagus arrive and peas make an appearance and that soon all my meals would include freshly picked green produce.  This is a lie.  I still have a few more weeks and I am mad about this.  I am feeling duped and deceived but instead of spending the next few weeks sulking I figured I needed to look for new ways to find the taste of spring which is how I found myself consulting my file of Mexican recipes.  Some would consider Mexican food rather heavy but that is the more Americanized version of Mexican food.  Typical Mexican food is all about citrus and chiles and lean proteins.  Ingredients that pack a lot of punch and flavor.  This recipe for Swordfish with Chile Pesto is the perfect transition to spring dish.  It's light and easy (as the weather warms up cooking should become easier and quicker).  The pesto is smoky, spicy, and complex making it the perfect accompaniment to simple grilled swordfish and creamy avocado.  It's a new way to look at spring.  

Swordfish with Chile Pesto
Recipe via Tasting Table 

Serves 4 - 3 Tacos each (I also think you could slice the swordfish smaller and use 16 tortillas, up to you!)  

This makes a decent amount of pesto which is a good thing in my book.  I am envisioning using the leftovers to make a Mexican chicken salad or just using some as a condiment on a grilled chicken and avocado sandwich.  

Chile Pesto

Dried guajillo chiles, 5 (stems removed and seeds discarded)
Dried ancho chiles, 3 (stems removed and seeds discarded)
Water, 1½ cups (boiling)
Extra-virgin olive oil, ¼ cup plus 1 tablespoon
Pumpkin seeds (pepitas), ½ cup
Limes, 3 (2 juiced and 1 sliced into wedges for serving)
Cilantro leaves, ¼ cup
Red pepper flakes, 1 teaspoon
Garlic cloves, 3 (roughly chopped)Kosher salt, 1 teaspoon
Finely ground black pepper, 1 teaspoon

Swordfish

Swordfish, two 8-ounce steaks
Extra-virgin olive oil, 1 tablespoon
Kosher salt
Freshly ground black pepper
Corn tortillas, 12 (warmed for serving)
Avocado, 1 (halved, pitted and thinly sliced)

Make the pesto: In a medium bowl, add the Guajillo chiles, Ancho chiles, and boiling water. Cover the bowl with a sheet of plastic wrap and set aside for 15 minutes. Use the tongs to transfer the chiles to a paper towel-lined large plate. Reserve ½ cup of the chile water and discard the rest.

In a small skillet set over medium heat, add 1 tablespoon extra-virgin olive oil and the pumpkin seeds. Cook, using the wooden spoon to stir frequently, until the pumpkin seeds are golden brown and fragrant, about 5 minutes. Transfer the pumpkin seeds to a blender or a food processor and add the reserved, softened guajillo and ancho chiles, ¼ cup of the chile water and the extra-virgin olive oil, lime juice, cilantro leaves, red pepper flakes, roughly chopped garlic, kosher salt, and freshly ground black pepper.  Process until the pesto is smooth, adding more of the remaining ¼ cup of chile water if needed to thin and smooth the mixture. Use the rubber spatula to scrape the mixture into a medium bowl and set aside.

Make the swordfish: Season both sides of the swordfish steaks with extra-virgin olive oil, kosher salt, and freshly ground black pepper. Place a grill pan over medium heat and add the swordfish. Cook until marked from the pan, about 2 minutes. Use a spatula to flip the swordfish steaks over, cooking the other side until the fish is cooked through, about 2 – 3 minutes more. Transfer to a cutting board and rest the swordfish for 5 minutes before slicing crosswise into 1-inch-thick pieces. Arrange the swordfish on the serving platter and serve with the chile pesto and the warmed corn tortillas, avocado slices, and lime wedges.             


Wednesday, April 10, 2013

gooey butter cookies.


If you ever come and stay over at my apartment or if you invite me to stay over at yours I can guarantee I will show up with (or make you) a breakfast treat.  It will be something sinfully delicious (most likely a sugar bomb) and something I would never make myself on a regular basis (because I have some sense of restraint in my life).  If you are really lucky I'll bring you the St. Louis Ooey Gooey Butter Cake which gets so many requests that I should no longer even attempt to bring anything but it.  It's seriously amazing -  a yeasted cake bottom and a creamy, dreamy buttery top (somehow this qualifies as breakfast food).  It's sweet and rich and should probably be illegal in most states, but I can't help but love it (and most everyone else feels the same way). Sadly, (my arteries are probably happy) it only ever gets made once a year, but low and behold there is a genius chef in St. Louis that decided that Gooey Butter Cake could be turned into Gooey Butter Cookie and when I discovered this my heart skipped a beat. These cookies are basically the moistest and most excellent sugar cookies you've ever encoutered.  They are sweet but not in a super cloying way. They are soft and tender and pretty much perfect and I think they would make for an excellent breakfast if your're into cookies for breakfast (there is no shame in cookies for breakfast but only every once in a while).  

Gooey Butter Cookies
Recipe via Tasting Table

Makes about 3 dozen (it also halves very well!)

4½ cups all-purpose flour
1 tablespoon plus 1 teaspoon baking powder
1½ teaspoons kosher salt
1 pound cream cheese, at room temperature
1 stick (8 tablespoons) unsalted butter, at room temperature
2¼ cups granulated sugar
¼ cup glucose syrup (or an additional ¼ cup granulated sugar)
½ vanilla bean--halved lengthwise, seeds scraped away and reserved
2 large eggs
1 teaspoon vanilla extract
2 cups confectioners' sugar, plus extra for serving

Preheat the oven to 325°. Set a fine-mesh sieve over a large bowl and sift together the flour and baking powder. Add the salt and whisk once to combine.

In the bowl of a stand mixer fitted with the paddle attachment, add the cream cheese, butter, sugar, glucose syrup and the vanilla seeds. Mix on medium speed until the batter is light and airy, scraping down the sides and bottom of the bowl as needed, about 3 minutes. Add the eggs and vanilla extract and beat until well combined, scraping the sides and bottom of the bowl as needed. Turn off the mixer, add the flour mixture, then mix on medium-low speed until just combined.

Line a rimmed baking sheet with parchment paper. To a medium bowl, add the confectioners’ sugar and set aside. Scoop the dough into 2-inch balls about the size of a golf ball, then roll each ball in confectioners’ sugar before placing them 2 inches apart on the baking sheet.

Bake the cookies until they spread and puff slightly, 12 to 15 minutes. They should be set around the edges and very soft in the center (don’t let the cookies brown). Remove the cookies from the oven and cool 5 minutes before transferring the parchment paper with the cookies on top to a wire rack to cool completely. Repeat with the remaining dough.

Once the cookies are completely cool, stack them in an airtight container and refrigerate. Serve chilled and dusted with more powdered sugar.

Make ahead: The dough can be refrigerated in an airtight container for up to 3 days before baking.

Storing: The cookies can be stored in an airtight container in the refrigerator for up to 1 week.

Tuesday, April 9, 2013

black and white all over.

Currently craving nothing but black, white, and nude/gold (this extends to my wardrobe as well).  I'm not sure if my sub-conscious is trying to tell me to simplify and shed the world of excess color, but all I want is clean simple lines and a minimalistic palate.  

Bare bulbs and subway tile complete the look.  

New York seems to finally be rubbing off on me.  


Image via Pinterest 

Monday, April 8, 2013

breakfast pizza.


I discovered this past week that not everyone in this world shares my affinity for cold leftover pizza.  I didn’t realize it was odd to wake up on a weekend morning craving a slice of pizza and eating it straight from the box in the fridge (and not even out of sheer laziness do I eat it cold but just because it’s really good that way).  I thought this was normal behavior (and not just normal college behavior but normal behavior no matter your age) but I was sorely mistaken and now I feel completely out of sorts.  For those silly people who insist upon warm pizza for breakfast, I present to you this breakfast pizza.  This is not a recipe for reheating leftover pizza (I think most everyone can handle that on their own) but rather it’s a recipe for combining my two favorite things into one dish, eggs and pizza, in order to make one delectable breakfast.  A white pizza is topped with crumbled bacon, eggs, and herbs in order to make one indulgent and messy meal that is best eaten on a lazy weekend morning.  

Breakfast Pizza
Recipe adapted (barely) via the NYTimes

Makes Two 12-inch Pizzas (with each pizza serving 2 people)

I streamlined this recipe a little.  I find if you dice the bacon small enough it will cook directly on the pizza (cooking it before hand I find burns the bacon when cooking the pizza, plus you eliminate a pan to be cleaned!)  I also cooked the pizza for 2 minutes before topping with the egg as I prefer a bit of a runny yolk but if you are firmly against runny yolks then add the eggs when topping with the cheese and bacon.  Also if you make the dough Friday evening you can have one pizza Saturday and one Sunday as I find the dough to keep more than one day!

For the Dough
1/2 teaspoon active dry yeast
2 cups plus 2 tablespoons bread flour, plus more for dusting
1 teaspoon kosher salt

For the Pizza

1/3 cup bacon, diced
¼ cup grated parmesan
1 ½ cups grated mozzarella (or you can up this to 2 cups and omit the goat cheese below)
½ cup crumbled goat cheese
4 – 6 large eggs (you can use 2 or 3 per pizza depending on your preference)
Freshly ground black pepper
2 tablespoons minced chives
2 scallions, thinly sliced

The night before, prepare the dough: place ¾ cup lukewarm water in the bowl of an electric mixer fitted with a dough hook. Sprinkle in the yeast, stir and let sit for 5 minutes. Add the flour and 1 teaspoon of salt and mix on low for 1 minute. Increase the speed to medium and mix for 2 minutes, then increase the speed to high and mix until a smooth dough forms, about 2 minutes more. Turn the dough onto a lightly floured surface, divide into two equal pieces and form each half into a tight ball. Place on a large floured sheet pan, place the pan in a plastic garbage bag, tie the bag loosely and refrigerate overnight.

One hour before baking, place the dough in a warm spot. Adjust the oven rack to the lowest position and set a pizza stone on it (or a baking sheet). Preheat the oven to 500 degrees.

Dip your hands and a ball of dough into the flour. On a lightly floured countertop, pat the dough into a disc with your fingertips, then drape the dough over your fists and carefully stretch it from beneath to form a 12-inch circle.

Carefully remove the pizza stone or baking sheet from the oven.  Place the dough on the stone/sheet.  Top the dough with half the mozzarella, goat cheese, Parmesan, and bacon.  Place the pizza in the oven and cook for 2 – 3 minutes.  Remove the pizza from the oven and top with the eggs.  Place the pizza back in the oven and cook for another 3 minutes.  Remove the pizza again and top with half the chives and scallions.  Continue cooking for another 3 minutes or until the crust is golden, the cheese is melted, and the egg whites are set.  Let cool for 2 minutes, slice and serve immediately.  Prepare the second pizza the same way. 


Saturday, April 6, 2013

homemade matzoh.


I am not Jewish which is probably why I do not associate Matzoh with Passover.  I see Matzoh and think cracker! Super awesome vehicle for eating chunky peanut butter! Flat bread for turkey!  All of these reasons are why I do not regale matzoh to being eaten 8 days a year.  I eat it for breakfast and as a snack (salted matzoh only) and I feel like I can and do because I’ve never associated it with a holiday (and probably because I’ve also never had to use it as a substitute for bread.  Let’s be honest, I don’t see myself ever being able to give up bread, even for 8 days.  I am really showing my lack of will power on this blog.)  Matzoh should be treated as it’s super awesome self and let it’s cracker cape shine because in my opinion we should call a spade a spade and define matzo as a cracker which is why 4 days after Passover has ended I have decided to try my hand at homemade matzoh.  (I had planned on making this during Passover since it seemed a little more logical but life and far too many other things got in the way of that happening.)  Homemade matzoh as the boy just kindly informed me is leagues better then the stuff you buy in the supermarket (his quote “you can eat this plain and it’s still really good!”).  This recipe is remarkably easy and quick and it makes a ton which allows you to come up with a plethora of ways with which to eat it. 

Homemade Matzoh
Recipe via The Mile EndCookbook

Makes 8 very large pieces.  You can also halve this!

4 1/2 cups sifted all-purpose flour, plus more for rolling
1 teaspoon Diamond Crystal kosher salt, plus more for sprinkling
2 tablespoons canola or other neutral flavor oil
3/4 cup plus up to 1/4 cup warm water

Preheat the oven to 500°F (260°C) and place a pizza stone (ideally) or a 10-by-15-inch baking sheet (realistically) on the bottom oven rack.

In a large bowl, mix together all of the ingredients, using 3/4 cup water, until they come together to form a dough. If the dough seems dry, add more water, a touch at a time. If you do not need the matzoh to be kosher for Passover, let the dough rest for 10 to 15 minutes. If you do need the matzoh to be kosher for Passover, proceed immediately to the next step.

Divide the dough into 8 pieces. Flatten a piece slightly and pass it repeatedly through a pasta maker, reducing the thickness each time until you reach the minimum setting. Alternately, you can simply roll the dough as thinly as possible with a rolling pin on a lightly floured surface. Repeat with the remaining dough pieces.

Trim the rolled-out dough pieces into rectangles. Use a fork to prick holes in the surface of the dough. lf salted matzoh are desired, brush or spray the dough surface lightly with water and sprinkle with salt to taste.

Carefully place some of the pieces of dough onto the pizza stone or baking sheet. They should fit snugly. Bake until the surface of the matzoh is golden brown and bubbly, 30 to 90 seconds. Using tongs, carefully flip the matzoh pieces and continue to bake until the other side is golden browned and lightly blistered, 15 to 30 seconds. Just let the matzoh get a few dots of light brown; do not let the matzoh turn completely brown as it will taste burnt. Keep careful, constant watch to keep the matzoh from burning; the exact baking time will vary from oven to oven and will get longer with subsequent batches.

Wednesday, April 3, 2013

living room lust.

We got a couch!  We got a couch!! (I am sitting on it as I type and I am still in awe of the fact that I no longer have to sit solely on the floor.)  154 days after Hurricane Sandy hit and we finally have all the makings of an apartment which is shocking because I never imagined we would ever get back to this point, which isn't to say we are done decorating.  Oh no, there is still so much left to do.  Throw pillows to be purchased (one can never have too many throw pillows), kitchen stools to be found, coffee table objects to be discovered, and photos to be hung up.  I've spent the majority of the last few days finally allowing myself to look at all my favorite living room photos that I've collected on Pinterest.  I'm currently obsessing over mismatched pillows (the Everyday I'm Hustling pillow will be purchased because it's cheeky and fun which is everything I love in life), large gold animals to live on my coffee table (does anyone know where the below deer is from?), picture frame walls, and streamlined floor lamps (black and gold is classic and beautiful).  

Oh and I'm on the hunt for the perfect agate bookends, because they are beautiful.  My work is never done.

All pictures via Pinterest.  


Tuesday, April 2, 2013

grapefruit bars.


Grapefruit gets very little love.  Usually it's regaled to the world of breakfast diet food which is rather unfortunate since it can and should be used for so much more.  While thinking about lemon bars last week (the reason being I had a super fabulous one from Thirty Acres in Jersey City which if you haven't been yet I suggest you go because they are doing some pretty wonderful things) I got to pondering why you never see blood orange bars or grapefruit bars, why does the lemon get all the love.  I think the issue with other citrus fruits is that the ratio can't be 1 to 1 (trust me I made the first batch trying that and it tasted like barely any fruit at all), you need to concentrate the juice of the grapefruit my boiling it down to half or even more (the more concentrated the more flavor!).  Once you concentrate it down you can use it as you would lemon juice (or in conjunction with lemon juice!) which makes for a pretty magical bar.    

Grapefruit Bars
Recipe adapted from/inspired by here and here!

I suggest concentrating the grapefruit juice down by at least half if not more to really allow the flavor to come through.  I also think blood oranges would be beautiful in a bar like this!  Really the possibilities are endless.   To concentrate the juice you simply boil the juice down over medium-low heat, stirring on occasion until it reduces by half.  Pretty simple! 

For the crust

1/4 cup (50 grams) granulated sugar
1 teaspoon freshly grated lemon zest
1/8 teaspoon table salt
1/2 cup (4 ounces or 115 grams) unsalted butter, cut into chunks
1 cup (125 grams) flour

For the grapefruit layer

2 large eggs
3/4 cup (150 grams) granulated sugar
6 tablespoons concentrated grapefruit juice
1 tablespoon lemon juice
1/3 cup (40 grams) all-purpose flour
1 tablespoon grapefruit zest, lemon zest or a combination of both
Confectioners’ sugar, for dusting

Preheat your oven to 350°F (180°C) and line an 8x8x2-inch baking pan with parchment, letting it extend up two sides. Butter or coat the bottom and sides with a nonstick spray and set the pan aside.

Make the base: In a food processor, pulse together the sugar, zest and salt until combined. Add the butter and pulse until it is evenly dispersed in the dough. Add the flour and pulse the machine until it’s just combined and the mixture is crumbly. Press the dough into the prepared pan and about 1/2-inch up the sides. Don’t worry about making this perfect. Bake for 15 minutes, until lightly browned at edges. Let cool on a rack while you prepare the filling (though no need for it to be completely cool when you fill it). Leave oven on.

Make the grapefruit layer: In a medium bowl, whisk together the eggs, sugar and grapefruit/lemon juice until smooth. Mix in citrus zest. Stir in flour. Pour into cooling crust and return pan to the oven, baking the bars until they’re set (they’ll barely jiggle) and slightly golden at the edges, about 25 to 30 minutes. Cool completely before cutting into rectangles. (You can speed this up in the fridge.)

Cut them in squares. Dust with powdered sugar before serving. Store in fridge for up to a week.